
Bonjour! For my birthday, my lovely older sister gave me Peter Reinhart's Artisan Breads Every Day. The book is brilliant. It somehow enables even the clumsiest bakers (such as myself) to produce glowing and edible goodies such as the ones pictured above.
The croissant consists of two basic parts: the detrempe and the butter block. I made the detrempe a day ahead. First I whisked together flour, salt, sugar, and yeast in a large mixing bowl. To this concoction I added milk and water, then finally the melted butter. I poured the butter in slowly and used a steady whisking to incorporate the drizzle.
Then I plugged in my hand mixer (with paddle attachments) and worked it through the flour mixture on the lowest speed for a minute. I scraped the dough down from the sides of the bowl, then kept mixing at the low setting for another 30 seconds. Reinhart says the dough should be "coarse, wet and shaggy." If it's too dry, splash in a little water. Too wet? Add flour.
When my dough was the perfect texture, I amped up the mixer to medium-high for fifteen seconds, until the dough seemed more coherent, not falling apart in the churning of the mixer.
I rolled the dough out onto a large, lightly floured cutting board and shaped it by hand--don't you love playing around with dough? If you've got an apron on and no pressing reason to go near your laptop, that is--into a large ball.

I grabbed another somewhat-large mixing bowl and poured a little vegetable oil in the bottom, then swirled the bowl around to coat the sides.
Then I hefted the large dough-ball into the bowl and covered the top with plastic wrap. Miraculously, it was able to take shelter in my fridge, where it stayed overnight.
It was about 24 hours later when I returned to my croissant project. I began by moving my three sticks of butter from the refrigerator to the freezer for about 20 minutes.
I then took the butter and chopped it into sixteen pieces. I took one of the many large mixing bowls I've been forced to amass and added the butter in with two tablespoons of flour.
Make sure you do a load of dishes between detrempe day and butter block day. That might be your style anyhow, but I realized belatedly I would need the hand mixer paddles festering in my sink and was setback about thirty minutes while they were sanitized.
Anyway! I used the aforementioned handmixer on a low setting at first, which made the butter look like it was shedding. I used a silicone spatula to scrape the mixture down from the sides, then kept mixing until the butter and flour started to become one. As with the detrempe, I raised the speed until the flour and butter came fully together to form a lumpless paste.
I then turned the butter out onto a large piece of parchment paper mister with cooking spray. I gave the butter a spritz of Pam as well before covering it with plastic wrap. With the help of my dough scraper, I formed the butter into a perfect six-inch square, 1/2-inch thick and smoothed on top.
 |
| Mmmm, healthy living. |
After sprinkling it with flour, I rolled out the dough until it was a rectangle 12.5 inches wide and 6.5 inches long. I then flipped the butter block from the parchment paper onto the left half of the rectangle, situating it until left with a 1/4-inch border on the top, bottom, and left sides.

I lifted the right side of the rectangle and laid it flat on the butter block, crimping the edges in order to envelop the filling.
The next step in the process is called lamination. My last experience with lamination was abusing the machine at my fathers office to preserve my well-done crossword puzzles and favorite Marmaduke cartoons, but this was something different. I am revealing this now because I believe we have surpassed the statute of laminations.
I lifted the dough on each side to sprinkle more flour beneath--you do not want this dough snagging during the delicate lamination process. Then I rolled out the dough--using a firm but not overly-pressured hand--into a rectangle 9 inches long and 16 inches wide. Get used to these measurements, you will use them quite a few times in the upcoming steps. For the rolling-out process, Reinhart recommends starting from the center and pushing out to the corners, then pushing out from the center to the sides. If the dough begins to struggle or snap back into place, let it rest a few minutes before attempting again. For the most part, it's a nice, obedient dough.
Once I reached the coveted size, I used my dough scraper to form the corners into actual points, rather than rounded approximations.
I then folded the dough as you would a letter before stuffing it into an envelope.

The dough rested, covered loosely in plastic wrap, for twenty minutes at room temperature (most of this I occupied by washing my hands and taking pictures of the little beauty.)
Then I rolled it out again, with the closed edge of the "letter" facing me, to--you guessed it!--a 16-in x 9-in rectangle. I folded it letter-style, covered it in plastic wrap, and let it rest this time in the refrigerator--as Reinhart directs if you notice your butter is getting too soft.
I rolled the dough out one more time to the regular rectangle. After a twenty-minute-refrigeration, I returned the dough to the floured counter--first ensuring that I had room enough to roll out a rectangle 24-28 in. wide and 9 in. long. You've hit the big-time!
When I had stretched the dough out to this length, I used the ruler on my dough scraper to measure and mark every 4 inches along the bottom of the rectangle. Then at the top, I started measuring from two inches in--again marking every four inches with a dot.
 |
| The dashes are from the first time I tried measuring and I messed up... |
Then at the center of each 4-inch base, I cut a 1-inch notch into the bottom.
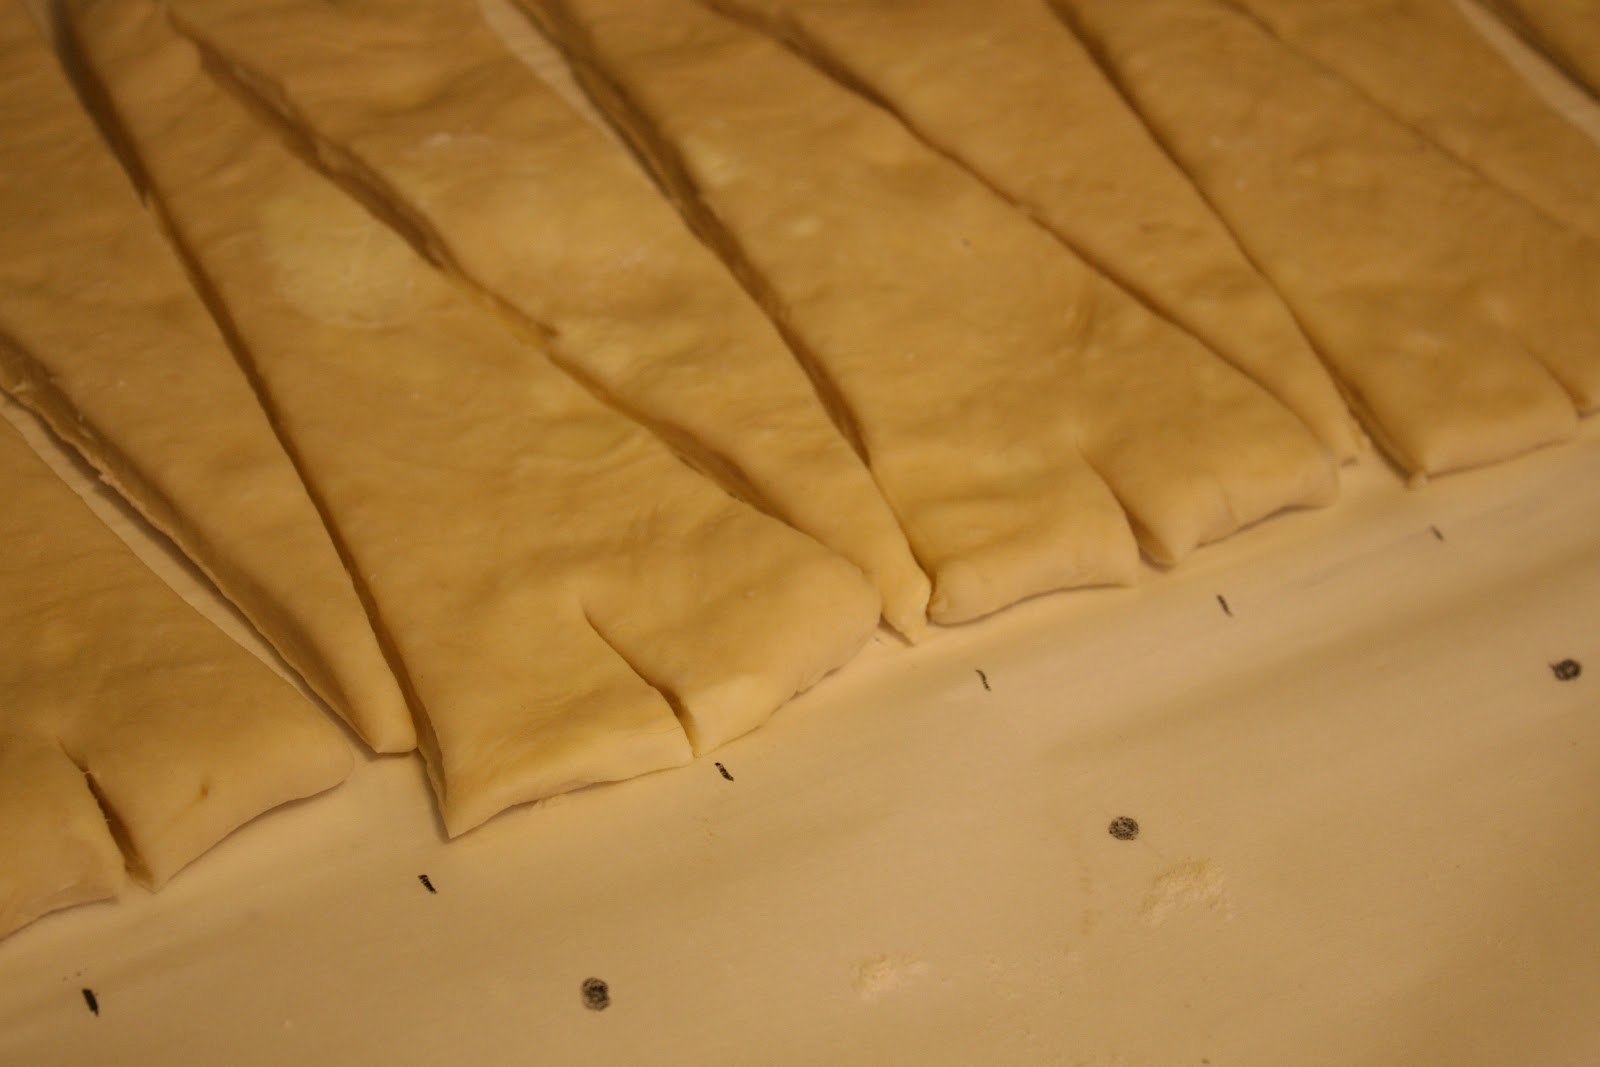 |
| Like mini-Eiffel Towers! Appropriate, non? |
I then spread these notches wide, like wings, and rolled them up toward the point of the triangle, pulling on the point to elongate each roll.
These rolls should form anywhere from 5-7 "steps." If you wish to have more, you can twist the edges of each croissant.
 |
| Not a Pillsbury can in sight! |
Twenty minutes before I was ready to bake, I preheated the oven to 450. Ten minutes later, I created an egg wash with two egg yolks and two tablespoons of water beaten together. I brushed this over each croissant to give it a certain sheen (who wouldn't want their croissants to be Winning?).
I put the pans in the oven, immediately lowering the heat to 375. The croissants baked for thirty minutes total--though I rotated the pans halfway through. About ten minutes before they were done cooking, I noticed a few of the croissants getting fairly dark, so I lowered the heat to 330 to let them finish out their days.
 | ||
| And I still had to wait to eat these bad boys...damn you, baking! |
Homemade Croissants (from Peter Reinhart's Artisan Breads Every Day)
DETREMPE
4 2/3 cups unbleached bread or all-purpose flour
1 3/4 teaspoons salt, or 2 1/2 teaspoons coarse kosher salt
1/4 cup sugar
1 tablespoon instant yeast
3/4 cup plus 2 tablespoons cold whole or low-fat milk
1 cup cool water
2 tablespoons unsalted butter, melted or at room temperature
BUTTER BLOCK
1 1/2 cups cold unsalted butter
2 tablespoons unbleached bread or all-purpose flour
Bon appetit!
Those look fabulous!!! I would never have the patience to undertake such a massive task. You are a better person than I. I'm sure they were worth every calorie too ;)
ReplyDeleteLucie, these look absolutely fabulous and I am SO impressed with your patience, aplomb, and light-hearted approach to such a mind-boggling task I'm sure I would never have had the courage to tackle! Kudos to you and your culinary-inspiring family members.....I'm glad those genes were in there somewhere. I'll volunteer for the taste-testing team if you ever have a vacancy over here.
ReplyDelete......Nan
Nan, thank you so much for your kind comment! It made my day to read. Everything you bake is so delicious and wonderful. I'd be honored to have you as a taste tester, since I've enjoyed your cooking and baking quuuite a few times over the years. I'm thrilled to see you over Easter—I doubt little Mary Eleanor will be able to taste-test just yet, but I'd love to impress her some time too!
Delete