Monday, April 29, 2013

Spring Supper: Garlic-Braised Chicken and Leek, Morel, and Pancetta Risotto


This recipe is courtesy of both leeks and morels being in season and the rediscovery of my cast-iron cookbook. Happy facts!

My previous experience with leeks consists of a 48-hour cleanse I've completed twice, in which you boil the leeks and reserve the broth. For your meals, you eat a cup of diced leeks tossed in olive oil, lemon juice, salt and pepper. Broth is to be imbibed a few times a day. I imagine people have been through more trying experiences, but from the thirtieth hour onward, the repetition and the somewhat bandage-like texture of boiled leeks wore on a girl.

So I wanted to surround the leeks with good flavors, while not totally drowning them out. The French love leeks, and on some of my days (not sure if they're better or worse), I am a Francophile.

I chose a morel, leek, and pancetta risotto. Risotto is so much fun to make, pouring and stirring (and sipping on the remaining wine while you do so.)

It wasn't the easiest to cook this along with the garlic-braised chicken, but I managed.

I first prepared my mise en place.


I could only find dried morels, even though they're supposedly in season! I'm not sure where you'd find them completely fresh, but it was simple enough to reconstitute them, soaking the morels in a bowl of white wine and chicken stock for thirty minutes. I then drained them (reserving the liquid) and diced them up.

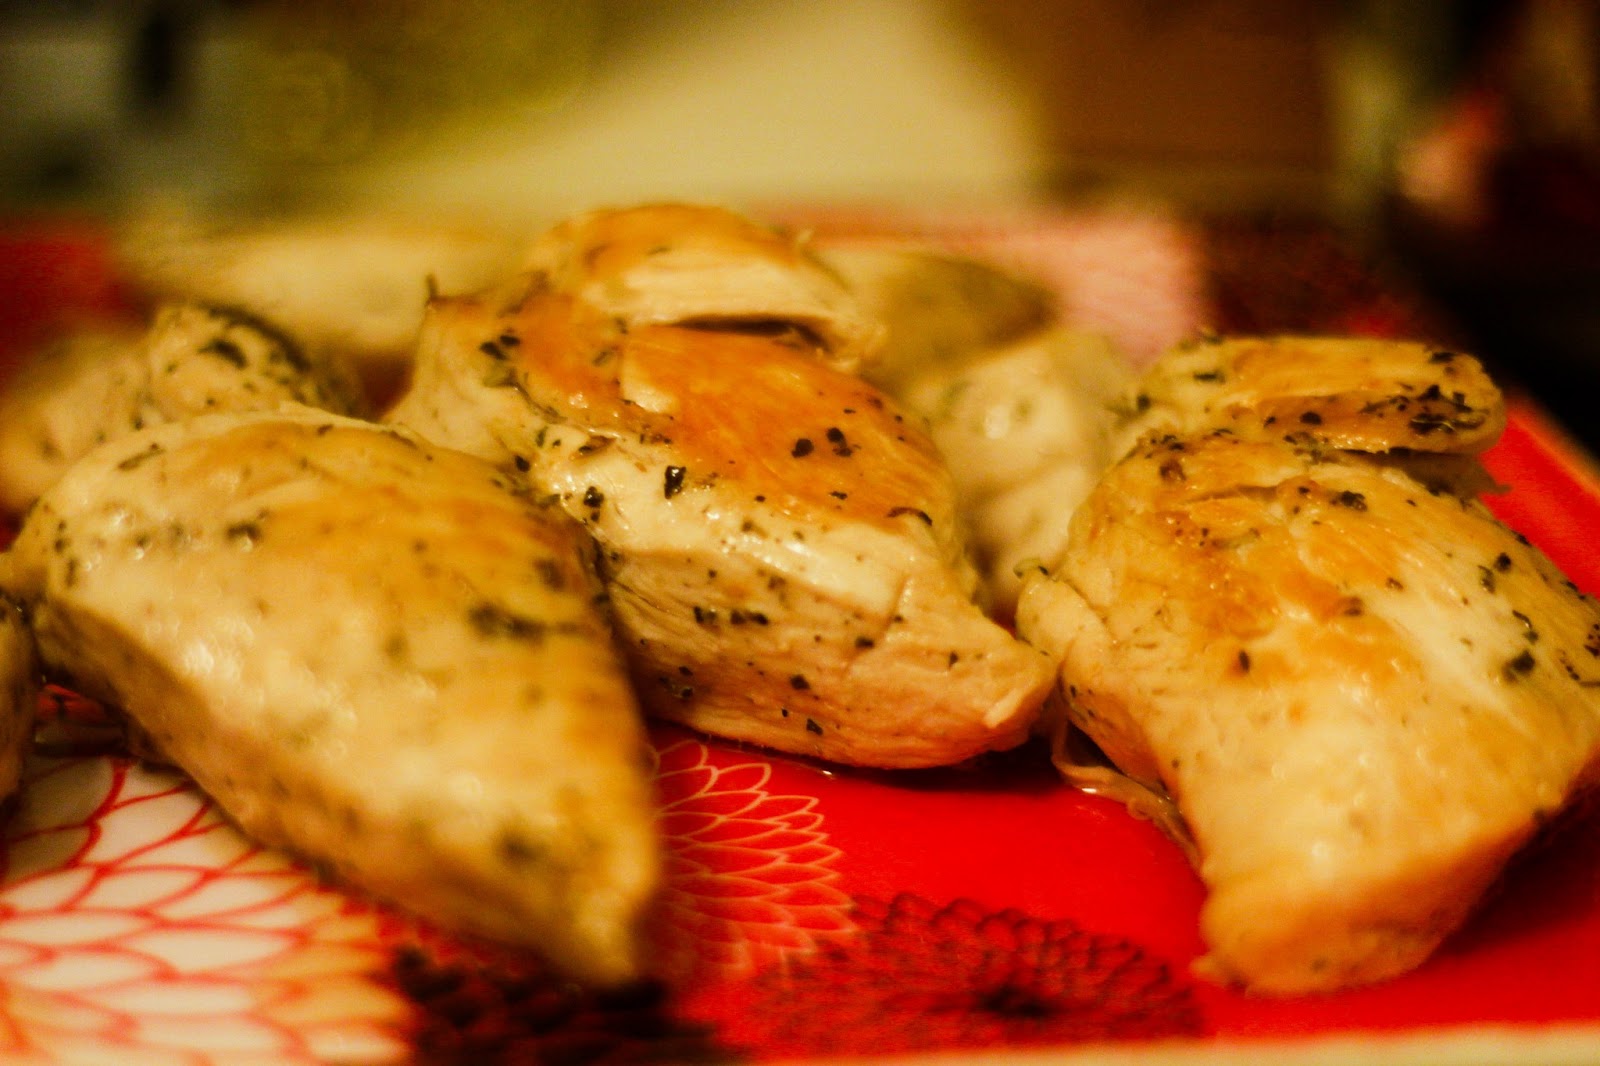
Then I seasoned my chicken and browned it in the Dutch oven. I placed the browned pieces on a plate which I covered with foil.


At this point, I added the garlic cloves for the braised chicken and the butter and oil for the risotto.


I was able to brown the onions, leeks, and morels at the same time that the garlic was turning a rich dark brown color. At this point, I added back in the chicken, along with vermouth, stock, cognac and sprigs of oregano (though thyme might have been better!)

While the chicken simmered, I turned my attention back to the much needier risotto, adding the Arborio rice and beginning the process of hydrating and stirring. Here was the perfect occasion to use some of the reserved liquid from the morels! So flavorful.

Once the rice was al dente, I stirred in heavy cream, then took it off heat to add the grated Parmesan. As my luck--or careful/panicky assessment of both recipes--would have it, the chicken was done too! I simply had to remove it from the pot and keep it warm while I let the sauce reduce for a few minutes.


A floral garnish was used for a much-needed pop of color.


Garlic-Braised Chicken
Serves 4 - 6.

2 lbs. chicken breasts
2 tablespoons herbes de Provence
3 tablespoons olive oil
20 cloves garlic
1/2 cup dry vermouth
1 1/2 cups chicken stock
1/8 cup cognac
2 sprigs oregano (or thyme)

1. Slice chicken into pieces about 3 - 4 inches in length. Season with salt, pepper, and herbes de Provence.
2. Heat up olive oil over medium-high in Dutch oven. Cook chicken in batches, browning on all sides. Reserve on plate and cover with foil to keep warm.
3. Lower heat to medium and add garlic cloves. Saute for 7 - 8 minutes, until hue is a rich dark-brown.
4. Return chicken to pot, along with vermouth, stock, cognac, and fresh herbs. Bring to a boil, then cover and reduce to medium-low. Let simmer for 30 minutes.
5. Remove chicken from pot and keep warm. Let sauce reduce for 5 minutes. Pour over chicken. Serve!

Leek, Morel, and Pancetta Risotto
Serves 3  - 4.

1 large leek, dark green leaves and root removed, light green section halved and then thinly sliced
3 oz. dried morels, reconstituted (with liquid reserved), then diced
2 oz. pancetta, diced
1/2 cup diced white onion
3 tablespoons butter
2 tablespoons olive oil
1 1/2 cups arborio rice
2/3 cup dry white wine
3 1/2 cups low-sodium chicken stock
1/2 cup heavy cream
2 tablespoons freshly grated Parmesan

1. Heat butter and oil in a large saucepan over medium-high. In another saucepan, bring chicken stock to a boil and then lower to simmer.
2. Add pancetta and cook for about 3 - 4 minutes. Add onions and cook for another 4 minutes. Then add leeks and cook, stirring often, for 5 minutes. Finally, add in diced morels and cook for 4 minutes.
3. Add rice, stirring to coat well with mixture. After a couple of minutes, add in white wine. Once the liquid has been absorbed, pour in two ladles of simmering stock.
4. Cook rice, stirring often, until liquid is absorbed again. Then add more, including 1/4 cup of the reserved morel liquid. Continue the process, adding 1/2 cup of liquid each time, until the rice is al dente.
5. Stir in heavy cream, then remove risotto from heat and stir in Parmesan cheese.
6. Enjoy!


Wednesday, April 24, 2013

Bears, Beets, Battlestar Galactica: An Eastern-European Supper


On the menu:
Charkhlis chogi (Roasted beets in a tart cherry sauce)
Katmis satsivi (Chicken in walnut sauce)
Pkhali (Spinach and walnut salad)

Here we have a hearty meal--one that took me almost three hours in the kitchen to turn out, but the time passed quickly, filled with glittering aromas of cinnamon, garlic, cherries, and my new spicy friend, fenugreek, among other things!

I'd never even heard of fenugreek before tackling Georgian cuisine (that is, Georgia the country, not the state. No peaches included.) But I was delighted to find that it smelled of roasted sugar, and balanced perfectly with the walnuts used in two of the above dishes.

My personal challenge this week was beets. My main association are the pickled sort from Thanksgiving. Not bad at all, but nothing I'd ever sought out beyond that holiday.


I wanted to do something a bit different, and when I found Saveur's menu for a "Georgian Supra," including Charkhlis chogi--or roasted beets topped with a tart cherry sauce--I rejoiced. Roasting tends to make any vegetable delicious, but I'd be able to put an exotic spin with flavors from an unexplored (culinarily speaking, but also in any other sense) country!

For the other dishes, I was pleased to find some shared ingredients, though the textures and resulting flavors were different enough to be complementary but not repetitive.

After I'd decided on the menu, the main issue was time management. I began with the beets, since their roasting would consume the most amount of time.


Pterodactyl!
About halfway through the beets roasting (at an hour and a half, the skin charred, but the flesh underneath was juicy and perfectly tender), I began cooking the chicken. I would recommend having the sauces for the Katmis satsivi and pkhali ready to go.

Walnut sauce for the chicken

Browning chicken
As the chicken simmered in the sauce, I moved onto the salad.


Then I removed the beets from the oven and let them cool for a few minutes in the freezer so I'd be able to peel and dice them.


After which I made the tart cherry sauce and finished off the walnut sauce by scooping out a ladle, beating it with an egg yolk, and then stirring the mixture back in.

Sprinkled with parsley and cilantro, and voila! Or whatever they say to show off in Georgia!

Lamazi--that means "beautiful."

Georgian Supra (adapted from Saveur)
Serves 3 - 4

Charkhlis Chogi (Roasted Beets in Tart Cherry Sauce)
3 medium beets, scrubbed
1/4 cup olive oil
Kosher salt and freshly ground black pepper, to taste
2 tbsp. unsalted butter2 cloves garlic, finely chopped
1/2 small yellow onion, finely chopped
1 tbsp. fresh lemon juice

1/2 cup dried tart cherries

1. Preheat oven to 400. Place beets in a small baking dish and drizzle with olive oil, then season with salt and pepper.
2. Cover dish with foil and roast in oven for 1 1/2 hours. Skin will be charred on outside. Place in freezer for five minutes until the beets are no longer too hot to handle.
3. Peel and dice into 1-inch pieces.
4. Prepare tart cherry sauce. Melt butter in medium skillet over medium-high heat. Add onions and garlic and  cook until golden. Stir in cherries and 1 cup water. Bring to a boil, reduce heat to medium, and let cook for 10 minutes.
5. Remove from heat and stir in lemon juice. Pour over beets and let dish rest until room temperature 

Pkhali (Spinach and Walnut Salad)
1 lb. baby spinach
1/2 cup toasted walnuts
1/4 cup cilantro
1/4 cup parsley
1/2 teaspoon hot paprika
1/4 teaspoon fenugreek
Salt and pepper, to taste
2 tablespoons olive oil
1 tablespoon red wine vinegar
2 cloves garlic, roughly chopped
1/2 small yellow onion, roughly chopped

1. Blanch spinach in large pot of boiling salted water for 1 - 2 minutes, until wilted. Using slotted spoon, add to bowl of ice water to stop cooking. Then drain, squeezing out as much water as possible. Puree in food processor, then set aside.
2. Puree with walnuts with cilantro, parsley, spices, oil, vinegar, garlic, and onion. Combine with pureed spinach.

Katmis Satsivi
1 1/2 cups toasted walnuts, plus 1/4 cup roughly chopped for garnish
2 1/2 cups chicken stock
3/4 cups roughly chopped cilantro
5 cloves garlic, finely chopped
1 small yellow onion, finely chopped
2 jalapeno slices, seeded and finely chopped
Kosher salt and freshly ground black pepper, to taste
3 tbsp. olive oil
1 lb. boneless, skinless chicken thighs, cut into 1 ½" pieces
1 1/2 tsp. sweet paprika
1/2 tsp. hot paprika
1/2 tsp. ground coriander
1/2 tsp. ground fenugreek
4 tsp. ground cinnamon
1 egg yolk
1 tbsp. red wine vinegar


1. In food processor, combine walnuts and 1/4 cup stock in food processor and puree until smooth. Then add half of cilantro, garlic, and onion, plus jalapeno, salt and pepper and puree until smooth again.
2. Brown remaining garlic and onion in olive oil in a medium saucepan over medium-high heat. Add chicken and brown, turning, for 7 - 8 minutes. Add in spices and cook until aromatic. Then add walnut sauce and stock and bring to a boil. Lower heat to medium and reduce for 35 minutes.
3. Scoop out one ladle of sauce and beat in a small bowl with an egg yolk. Return to sauce, stirring to combine, and cook for five more minutes. 
4. Garnish with walnuts and cilantro.


Tuesday, April 16, 2013

Making and Canning Strawberry-Rhubarb Jam


[Disclaimer: I am about to ramble. I will clearly mark the end of the ramble. You are welcome to skip my musings!]

With any skill set, you are bound to hit plateaus--long stretches where you worry that you're not doing anything different or more exciting. Where you start to get antsy or tired of this activity to which you've dedicated so much of your time, not because you no longer love the activity, but because you have not provided yourself with new challenges (or scenery, so to speak.)

I adore cooking. I could never have imagined how much it would change and enlighten me when I got the bug a few years ago. It started off as a date night activity with the guy I had just started to see, and now three years later, he's still right here with me, ensuring I don't undercook the chicken and producing plenty of dishes on his own. It might be true that at the start of my journey, I thought "oregano" was how Italians spoke of that state in the Pacific Northwest. Now I must say I'm a bit wiser.

But still I need to continue to grow and shoot for loftier goals, especially because with my packed schedule cooking can seem on the rarest occasions like a chore. I can't let that happen!

I would love to make my own seasoning mixture. Start a garden. Write a cookbook. Increase my originality in the kitchen. Read whole books on the science of cooking and fully understand what exactly I'm doing to these poor animals and vegetables.

For now, though, I did pick up the new techniques of jamming and canning, and I am anxious to push myself more.

END RAMBLE.

So to continue with my seasonal blog adherence--which is now in week 5!--I tackled rhubarb for the first time. It is not just a non-descript foodstuff that might have been mentioned by Laura Ingalls Wilder! It's a vibrant, tangy stalk complemented with sugary perfection by the strawberry.


For the rhubarb, you must be careful to trim it properly. The roots and leaves are poisonous. Do not poison people with your jam. It would leave a bad taste in their mouths. And possibly kill them. Please refrain.

Do not fret about the peel, though! It may come off a little as your dicing, but it is completely safe to cook your jam with rhubarb peel included. It's my understanding that the peel cooks down along with the rhubarb.


The fruit cooks for an hour or so, jamming all the while. (I invited my boyfriend to play guitar during the process. "You can jam while I can jam." I am a delight.)


When the jam was about halfway done, I started preparing my cans. The large pot of water took its sweet time boiling, but I expected nothing less.


Once the cans and lids were sterilized, I set them on a clean dish towel and quickly scooped in the now-done jam. While the timing doesn't have to be right on the nose, you want the jars to still be pretty warm when you add the hot jam.

Then I sealed the jars tightly and added them back into the boiling water.


After which they sadistically needed to cool for 24 hours before we could enjoy.

We bravely translated this setback into breakfast for supper.


Making and Canning Strawberry-Rhubarb Jam
Makes 3 8-oz. jars

1 1/4 lb. rhubarb, trimmed and diced
2 cups strawberries (about 8 oz.), hulled and quartered
2 1/4 cups sugar
1 tablespoon fresh-squeezed lemon juice
3 8-oz. canning jars (must have rings and lids)

1. Combine rhubarb, strawberries, sugar, and lemon juice in a large saucepan. Bring to a boil, then reduce heat to medium-low and cook for one hour, stirring occasionally.
2. About thirty minutes in, heat up large pot of water to boil. Unscrew lids from jars and add jars, rings, and lids to boiling water using tongs. Sterilize for ten minutes, then remove all items to a clean dish towel.
3. When jam is done, scoop immediately into still-warm jars. Seal jars and return to pot of boiling water, setting them upright at the bottom of the pot. Boil for 10 minutes. Return jars to clean dish towel and let cool for 24 hours.
4. After 24 hours have passed, test that the jar is sealed by removing the ring (but not the lid). Press down on the top of the lid with your index finger. If the lid springs back, it is not properly sealed. It should appear slightly concave.
5. Give jars clever titles and enjoy wowing your friends with your endless puns.

Sunday, April 14, 2013

Italian Stuffed Burgers


I've been talking lately with my coworker about the possibility of opening a food truck specializing in stuffed burgers. The problem for me when I talk about ideas like this is that it's difficult to limit myself. I want to cook everything. But I must adjust myself to practical concerns like inventory and time.

Here, though, is an item I think we could market quite well. With spaghetti and meatballs in mind, I created a burger stuffed with fresh mozzarella and slow-roasted roma tomatoes and served on toasted garlic buns. I did hope--for poetic reasons--that noodles would work as a topping. I have been told vehemently that they would not.

The slow-roasted tomatoes sat in for the desired marinara element, bringing that juicy tomato flavor without oozing out of the patty.


I fried the pancetta, pressing down on it to render grease, and then cooked the burgers in this flavorful oil.

To go alongside the burgers, I chopped up some red potatoes and sprinkled them with herbs and olive oil, then roasted them for close to an hour.


The hamburger buns were simply sprinkled with garlic powder and then popped in the toaster.

Then we assembled the burgers and ate--before we "snacked" on too much of the mozzarella and tomatoes.

The Italians certainly know how to meld their flavors.


Italian Stuffed Burgers
Serves 4. 

2 lbs. lean ground beef
1 shallot, minced
2 tablespoons oregano
2 tablespoons garlic powder
4 oz. fresh mozzarella, chopped
6 small rounds of pancetta
4 hamburger buns, halved, dusted with garlic powder, and toasted

4 roma tomatoes, quartered
1 tablespoon oregano
1 tablespoon garlic powder
1/4 cup balsamic vinegar
3 tablespoons olive oil

6 small red potatoes, chopped into 1-2 inch pieces
1 1/2 tablespoons rosemary
1 tablespoon olive oil

Parsley (for garnish)

1. Preheat oven to 200. Place quartered tomatoes on a baking sheet and sprinkle with herbs, balsamic, and olive oil. Roast for 2  hours.
2. When the tomatoes are almost done, mix together ground beef, minced shallots, oregano, and garlic powder.
3. Remove tomatoes from oven. Increase oven temperature to 400. Spread potatoes out on another baking sheet and coat with rosemary and olive oil. Roast in oven for 45 minutes.
4. Form thin burger patties, then top half the patties with mozzarella and a roasted tomato. Place an unadorned patty on top, then crimp the edges together to fully seal.
5. Fry pancetta in a medium skillet, pressing down to render grease. Once cooked, set pancetta aside and cook burger patties in the rendered oil.
6. Assemble burgers on toasted garlic buns, then top with pancetta--and another roasted roma if desired! Serve roasted potatoes on the side.


Tuesday, April 9, 2013

Spring Quinoa Salad


First I must give thanks to the weather.

The cold and rain of last week let up just in time for my visit home, where I had the privilege of enjoying a couple of boat rides, visiting with old friends, and cooking up delicious treats on my parents' patio.


Then when I got back to town, we visited the arboretum down the road--now I'm thinking of opening a facility called "Arboretum and Weep!" It will be a devastating, tree-studded area.

But after a weekend of heavy eating and late nights/early mornings, it felt fantastic to return to my seasonal endeavors and serve up a light, tasty dinner.

I chose radishes for this week. With turnips and cauliflower, I opted to roast in order to make them more palatable. Here though, I wanted to appreciate the taste of the radish raw.

I knew I wanted to pair them with the asparagus in my refrigerator. When I saw a few recipes online uniting the two with quinoa, I remembered one of my favorite dishes to prepare--Quinoa and Pistachio Salad with Moroccan Pesto. 

After a bit of reconfiguration, I put together a dish with similar flavors but a few new highlights.


The pistachio pesto had a robust but springy flavor, heightened by garlic and lemon zest.

I readied my fresh vegetables before preparing the quinoa.


Then once the quinoa was fully cooked, I stirred in the pesto, then the asparagus, chickpeas, and radishes.

The pesto provided a garlicky, nutty boost to the quinoa--which I always like to cook with a little grapefruit juice--and I found the radishes to be not just a crunchy garnish, but a terrific receptacle for flavor.


So lovely too!


Spring Quinoa Salad
Serves 4 (as side).

3 cups uncooked quinoa
1 1/2 cups water
1 cup veggie broth
3/4 cup grapefruit juice
Pistachio Pesto
1 bunch asparagus, trimmed
6 - 8 radishes, thinly sliced
1 cup chickpeas

Pistachio Pesto
1/2 cup cilantro
3/4 cup fresh basil
1/2 cup roasted pistachios, shelled
1/2 teaspoon lemon zest
1/4 cup grated parmesan
1/4 cup olive oil

1. Make pistachio pesto by combining all ingredients listed above in a food processor. Add more olive oil if needed. Reserve pesto in a bowl until quinoa is cooked.
2. Bring a medium pot of water to a boil. Add asparagus and cook for 5 - 6 minutes until bright green. Transfer to bowl of ice water to stop cooking.
3. In another medium pot, bring water, broth, and grapefruit juice to a boil. Add quinoa, cover, and reduce to a simmer. Cook for fifteen minutes, until all liquid is absorbed.
4. Meanwhile, remove asparagus from ice water. Pat dry and cut into 1-inch stalks.
5. When quinoa is finished cooking, transfer it into a large bowl. Stir in pistachio pesto. Then add asparagus, chickpeas, and radishes.
6. Serve!

Wednesday, April 3, 2013

Roasted Curried Cauliflower


One of my favorite strengths that I've developed through cooking is the ability to take taste into my own hands.

I hoped through my seasonal project that I could find occasion to take ingredients that once made me cringe or retch (I did once unforgivably ask my mom "What stinks?" Sorry, Mom!) and turn them into mouthwatering final products.

Part of my palate expansion can be attributed to maturity, sure, but I also have to thank the varied techniques and flavors of which I've learned. I can now take an item down many avenues before I find the best route. Cars! Maps! This is a metaphor!

My original plan was to use this as a side dish to Chicken Tikka Masala (one of the first dishes I cooked with my boyfriend!) but time and exhaustion took over and I ended up making the cauliflower as a light supper when I got home from my second job this evening.

No regrets!


To bring out the best flavor, I toasted coriander and brown mustard seeds.

Then I ground them up into the curry vinaigrette and drizzled it over the florets.


Roasted Curried Cauliflower.
Serves 2 - 3 as side.

1 head cauliflower, chopped into uniform florets
1/4 cup olive oil
1/4 cup balsamic vinegar
2 tablespoons curry powder
1 tablespoon cumin
1 pinch salt
1 tablespoon coriander seed
1 tablespoon brown mustard seed
1 sprig cilantro (for garnish)

1. Preheat oven to 450.
2. Spread florets onto a rimmed baking sheet.
3. In a small bowl, combine olive oil, vinegar, curry powder, cumin, and salt.
4. Heat a small skillet up to medium-high. Add coriander and brown mustard seeds and toast till aromatic (about 4 - 5 minutes.)
5. Grind up seeds and add to vinaigrette. Whisk to combine.
6. Drizzle vinaigrette over florets.
7. Bake for 35  minutes, turning the cauliflower over halfway through.