Tuesday, November 5, 2013

Pesto and Mozzarella Focaccia


How can you have tomato soup without a cheesy bread to sop it up?

This week in the Country Roads Test Kitchen, I revived the roasted tomato soup recipe from Il Posto Cafe in uptown New Orleans. Find the recipe here.

The soup, with its tremendous depth of flavor, needed an ideal dipping companion. I chose focaccia because it's easy and quick to make, and I love the freedom to spread my desired toppings over the dough before baking--like fancy pizza!

I adapted the pesto focaccia recipe from Whisks and Whimsy (which I hope has a meandering sister blog out there known as "Whisky and Whims.") Shamefully, I did not make my own pesto, because my food processor is broken right now. But my abashed, hanging head was rewarded with the lovely scent of roasting tomatoes. So instead of "Sorry I'm not sorry," I guess it's "I'm not sorry I'm sorry!" If that makes sense...

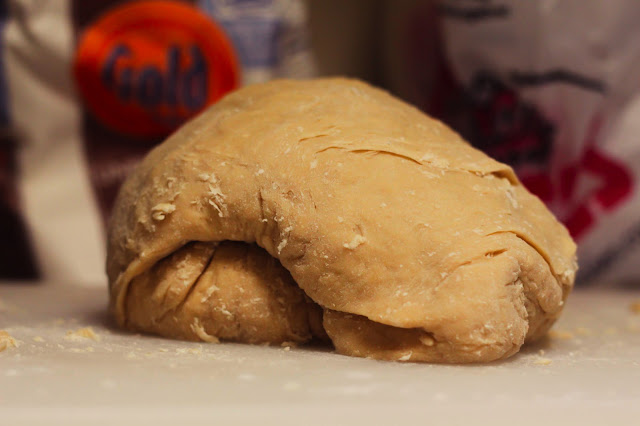
Back to the recipe! Once my dough was properly combined in my stand mixer (with the dough hook attachment), I left it to proof in the oven while I ran to the store for everything else. Perfect timing. All I had to do when I came back was roll out the dough, top it with pesto, onions, and fresh mozzarella, and throw it (or ya know, carefully set it down while wearing oven mitts and squinting at the heat waves) in the oven for 25 minutes.

While the bread cooled slightly, I finished my tomato soup. Then sliced the bread. Then dipped. Then sighed. Happy eating!


Pesto and Mozzarella Focaccia
Makes one large pan.

2 teaspoons rapid-rise dry yeast
1 cup water, warmed to about 115 degrees
2 tablespoons sugar
3 1/2 to 4 cups all-purpose flour
1 tablespoon kosher salt dissolved in 2 tablespoons water
1/4 cup extra-virgin olive oil, plus more for brushing
1/4 cup prepared pesto
4 oz. fresh mozzarella (pearls or torn into 1/2-inch pieces)
1/2 yellow onion, halved and thinly sliced

1. In the bowl of your standing mixer, combine the yeast, water and sugar. Stir to dissolve, and let sit for 3 minutes, until foamy. With the mixer fitted with a dough hook, turn the mixer on low speed and slowly add 3 1/2 cups of flour to the yeast mixture. Add the dissolved salt (doesn’t have to be completely dissolved) and slowly pour in the olive oil. When the dough starts to come together, increase the speed to medium and mix for about 8-10 minutes, until dough is smooth and elastic. Add the remaining flour a tablespoon at a time if the dough is too sticky.

2. Turn the dough out onto a clean counter and knead a few times before forming the dough into a round ball. Place the dough ball into a large oiled bowl, turning it so that it is coated with olive oil. Leave the dough ball in the bowl and cover with plastic wrap. Let rise in a warm place for about 45 minutes, until the dough has doubled in size.

3. Preheat oven to 400 degrees and coat a sheet pan with olive oil. Turn out the dough on your work surface. Roll and stretch the dough roughly into a rectangular shape (doesn’t have t be perfect); the dough should be about a 1/2 inch thick. Transfer the dough to the oiled sheet pan, cover with plastic wrap, and let sit for 15 minutes.

4. Uncover the dough and use your fingertips to make dimples in the dough. Brush the dough with extra-virgin olive oil and then brush the dough lightly with the prepared pesto and top with fresh mozzarella and onion slices. Bake the bread in the lower third of the oven for 15 to 20 minutes, until the top is golden.

Tuesday, October 29, 2013

Sesame Salmon and Quinoa Salad


This is going to be a fairly quick blog post, because I wasn't planning on blogging the recipe so I didn't take the usual plethora of pictures, but also because it's very simple!

I've been trying to increase the qualities of "cheap" and "healthy" in my meals lately (which can be fairly difficult living in New Orleans and also having a mountain of cookbooks/Internet access), and that drive has led to a little more "what can I work with in my pantry?" than usual.

For this meal, I got a bag of the cheap frozen salmon fillets (probably the most painful price cut of all) and set about slightly modifying a favorite recipe of mine: Quinoa and Pistachio Salad with Moroccan Pesto.

First off, I took out the pistachios. So expensive! (I will now take a moment to google: "How the heck can you grow your own pistachios, because damn the man.)

I also substituted the Moroccan pesto for a jar of basic pesto I had on hand, amped up by the addition of sriracha and honey, an enhancement I started using after making charmoula sauce. Sweet heat! So good. (Results from pistachio search: I would need to grow trees, and I am quite without a backyard. Innovation/scheming will continue later.)

And I added zucchini! For a little more green, I seasoned the zucchini slices with salt, pepper, and cumin and roasted them alongside the red peppers. For the salmon, I patted the fillets dry, rubbed them with oil, and formed an oregano and sesame seed crust on one side. Seared them in my cast-iron, then served!


There you have your pre-paycheck mods for a delicious dinner. Hope you enjoy!

Sesame Salmon and Quinoa Salad
Salmon serves 2. Salad serves 4—6.

2 frozen salmon fillets, thawed and skinned
1/2 tablespoon oregano
2 tablespoons sesame seeds
1 cup uncooked quinoa
1 cup reduced-sodium chicken stock
1 cup water
1 15.5 oz can chickpeas
1/4 cup pesto
1 tablespoon sriracha
1 tablespoon honey
1 large zucchini, thinly sliced
1 red bell pepper, stem removed, halved and seeded
1/2 tablespoon cumin
Olive oil
Salt
Pepper

1. Preheat oven to 400. On a large rimmed baking sheet, coated with cooking spray, spread out zucchini in a single layer in half the pan. Season with cumin, salt and pepper, drizzle with olive oil, and toss. Place bell pepper halves in other half of pan, cut side down. Roast in oven for 30 - 40 minutes, turning zucchini over halfway through. Remove when pepper is blackened and zucchini slices are browned. Let pepper cool, then remove skin and chop into 1/2 inch pieces.
2. In a medium saucepan, combine quinoa, stock, and water over medium-high heat. Bring to a boil, then reduce heat and cover. Cook for 10—12 minutes, until liquid is absorbed.
3. Meanwhile, season salmon fillets with salt and pepper on both sides. On top side, sprinkle with oregano and sesame seed picture, pressing sesame seeds into the fillet.
4. Heat up a tablespoon of olive oil in a medium skillet over medium-high heat. Once oil is shimmering, add fillets (crust side up). Cook for 4—5 minutes on each side. Remove from skillet and set aside.
5. Mix pesto, sriracha, honey, and chickpeas into quinoa. Serve each plate, topping quinoa mound with zucchini and red peppers. Serve salmon alongside.

Sunday, October 20, 2013

Roasted Sweet Onions Stuffed with Lamb and Apricots


These delicious stuffed onions were merely one component of a Mediterranean medley. You can read about the golden barley pilaf here and I'll share the cucumber and yogurt salad below. But I'd like to focus on this delightful combination of sweet and savory.

If we deem vidalia onions the vessel, then lamb, apricots, mint, and parsley are the precious cargo. The original recipe called from ground lamb, but the market was out of it, so I substituted for diced, seasoned, and browned lamb chops. It worked out beautifully.


And the final meal...


I just made two stuffed onions, but enough filling for four (...the extra was handily disposed.) I'll post the recipe serving four to corroborate more with the golden barley pilaf.

Roasted Sweet Onions Stuffed with Lamb and Apricots (via Leite's Culinaria)
Serves 4. 

1 1/2 cups chicken stock 
1/2 cup dried apricots (about 16), cut into 1/4-inch pieces 
1 teaspoons finely grated lemon zest 
4 smallish Vidalia or other sweet onions (about 3 pounds), unpeeled 
5 tablespoons unsalted butter 
1/2 pound lamb chops, diced
1 teaspoon ground cinnamon 
1 teaspoon ground cumin 
1 teaspoon kosher salt 
1/2 teaspoon freshly ground black pepper 
3 or 4 shakes sriracha 
2 tablespoons coarsely chopped fresh flat-leaf parsley 
2 tablespoons coarsely chopped fresh mint 
2 tablespoons fresh bread crumbs
1. Preheat the oven to 400°F (204°C) In a small pot over medium heat, combine the stock, apricots, and lemon zest. Gently simmer until the apricots are plump and the liquid is reduced to 1/2 cup, roughly 10 minutes.
2. Without peeling the onions, cut about 1 inch off the tops and just-
enough off the bottoms that each onion stands upright. Reserve the onion tops and discard the bottoms. Remove all but the outer two layers of each 
onion by scooping out the centers with a spoon or melon baller, reserving the insides. Set the onion shells in a baking dish along with the tops. Finely chop the insides.
3. Melt 3 tablespoons of the butter in a skillet over medium-low heat. Stir in almost all of the chopped onions, reserving some for another use, and cook until softened, 10 to 12 minutes. Add the lamb, cinnamon, and cumin and season with the salt and pepper. Raise the heat to medium-high and cook, continually stirring with a wooden spoon, until the lamb is crumbly, 7 to 8 minutes. Do not drain the rendered fat; it’s needed to keep the onions moist and to impart a luscious unctuousness to the overall dish. Remove the pan from the heat. Stir in the apricot mixture and its liquid, hot sauce to taste, and the parsley and mint. Let cool slightly. (The lamb filling can easily be prepared a day in advance, covered, and refrigerated.)
4. Spoon some of the lamb mixture into each of the hollowed-out onions, pressing down with your hands and mounding it over the onions. Sprinkle the 
bread crumbs over the onions and dot with the remaining 2 tablespoons butter. Cover the pan tightly with aluminum foil and bake until tender, 30 to 45 minutes, depending on the size. Remove the foil and continue to bake until the bread crumbs are brown, about 10 minutes more. Serve immediately.

Cucumber and Yogurt Salad
Serves 4.
1 English cucumber, peeled and thinly sliced
1 teaspoon lemon zest
1/2 tablespoon dried dillweed
1/2 cup plain Greek yogurt
Salt
Pepper

1. Combine all ingredients in a bowl, tossing lightly until cucumber slices are evenly coated. Serve. 

Friday, September 27, 2013

Chicken, Quinoa, and Kale Soup


Consider this my offering to the weather gods! If the air cools and I don't feel ridiculous, impractical, and feverish wearing boots and scarves, I will make this again and again.

Should my wish not be granted...oh, heck, I'll just set the A.C. to 68 and slurp up a bowl anyway.

The glory of brewing up a soup or stew exists in the ability to crane your neck over the pot, steam whispering at your earlobes, and inhale your crafted aromas.

I haven't cooked much with kale before, but I look forward to using it more! I hear a rumor it's good for you...

The combination of vegetables, plus a few choice spices (cumin, oregano, thyme, bay leaf, crushed red pepper), a parmesan cheese rind, and a garnishing squeeze of lime juice lent the broth a full, zesty flavor.

But let's move onto pictures and the recipe, so you can whip up your own possibly healthy soup!


Chicken, Quinoa, and Kale Soup (adapted from Iowa Girl Eats)
Serves 4.

1/2 lb. boneless chicken thighs
1 carrot, diced
1 celery rib, diced 
1/2 white onion, diced
1 tablespoon olive oil
Salt
Pepper
3 cups kale, torn
3 cloves minced garlic
1 zucchini, halved then thinly sliced
7 cups low-sodium chicken broth
1/2 tablespoon cumin
1 teaspoon dried thyme
1 teaspoon dried oregano
1 teaspoon crushed red pepper
1 teaspoon dried chives
1 bay leaf
2 cups chopped fingerling potatoes
2/3 cup quinoa, rinsed and drained
Parmesan cheese rind
1/4 grated parmigiano-reggiano (or parmesan)
One lime (to squeeze juice into each bowl)
Tortilla chips

1. In a large soup pot, heat up olive oil over medium-high. Add celery, carrots, and onions, season with salt and pepper, and sauté until tender (about ten minutes.)
2. Stir in kale and garlic. Season again with salt and pepper and sauté for two more minutes.
3. Now add 6 cups of chicken broth, zucchini, spices, and bay leaf. Bring to a boil and add in chicken thighs. Cook for 10 minutes, until no longer pink in the center. Remove chicken breasts and set aside.
4. Stir in quinoa, potatoes, and rind. Cover the pot and lower heat to medium. Cook for another ten to twelve minutes, until potatoes and quinoa are tender. Meanwhile, shred cooked chicken by tearing it apart with two forks.
5. Remove rind and bayleaf. Return shredded chicken to the pot. Taste and season with salt and pepper as needed.
6. Take pot off heat and serve, topping each bowl with grated cheese, lime juice, and two tortilla chips.

Monday, September 16, 2013

You Can Have Bagels Any Time


I've been rather neglectful of my blog lately, but I have been cooking! Sometimes I just let a little too much time pass before I sit down to chronicle a new recipe/technique, and then I continue to put it off until it's just a vague memory.

But I have to talk about bagels.

This little culinary adventure was borne not out of a lack of breakfast foods at my house, but a very specific craving for bagels, and the realization that I could just make them myself.

And now you can too!


NOTES:
1. When you go to boil the unbaked bagels, the dough may become disconnected. No worries--it's still malleable enough to reconnect before you pop them in the oven. But for better footing, make sure to twist the dough at the connecting point to give it a stronger link.
2. It is possible to sprinkle the baking sheet with cornmeal before you cook, so the bagels are less likely to become stuck. Simply greasing the sheet should be fine, though.
3. Toppings are fun! I worked with what I had: sesame seeds, fenugreek (an Eastern-European spice that has a somewhat Christmasy aroma, in my opinion), oregano, and a seasoning mix called Big & Bold, with rosemary, onion powder, paprika, and garlic, among other things.
4. Next time I'd love to experiment with different flavors in the dough itself. Cinnamon raisin swirl, blueberry, mmmm.

Homemade Bagels (adapted from Food Network)
Makes 12.

2 cups warm water, about 110 degrees F
2 (1/4-ounce) packets active dry yeast
3 tablespoons granulated sugar, plus 1 tablespoon
5 to 6 cups all-purpose flour
2 teaspoons salt
2 teaspoons vegetable oil

Desired toppings (ex. sesame seeds, poppy seeds, dried herbs.)

1. In the bowl of a standing mixer, proof water, yeast, and 3 tablespoons of sugar for about five minutes, until properly foam. Gradually stir in (using dough hook) four cups of flour.
2. Once mixture has come together, add remaining cup or two (as needed), half a cup at a time, until a stiff dough is formed--use a wooden spoon or hands to bring dough together.
3. Turn dough out onto lightly floured surface, kneading for five minutes. Add flour as needed, until heavy, smooth dough ball is formed.
4. Place in a lightly oiled bowl. Cover with plastic wrap and let rise in warm area for 45 minutes - 1 hour, until doubled. (I heated my oven to 200, then turned it off before placing dough inside.
5. Once doubled, remove dough from bowl and punch down. Separate dough into 12 pieces. Roll each piece into a ball, then use hands to shape the balls into 4–6 in. logs. Connect the ends of logs to form theoretical bagels. Twist at connecting point to secure.
6. Place bagels on lightly floured surface. Cover loosely with clean towels and let rise for another twenty to thirty minutes.
7. In a large heavy pot, bring 12 cups of water and one tablespoon sugar to a boil. One at a time, use tongs to place bagels into the boiling water--thirty seconds to a minute on each side. Place desired toppings in shallow bowls. Dip one side of bagel into toppings, then place--topping side up--on a large greased baking sheet.
8. Preheat oven to 375. Once all bagels have been boiled and topped, place baking sheet in oven and let cook for 30 minutes, until tops are golden.
9. Cool bagels on a wire rack until room temperature. Slice, slather in cream cheese (or don't), and enjoy!

Sunday, August 25, 2013

Instead of Kraft, Get Crafty: Skillet Baked Mac with Spinach and Turkey Bacon


You know, I stepped into my kitchen last night just intending to make a sandwich. We indulged in gourmet hot dogs for lunch (duck sausage, yessir) and I wasn't exactly starving.

But a craving that had been bubbling in the back of my head for quite a while now finally boiled over. I needed macaroni and cheese.

I'm fairly proud of the fact that I composed this solely of items I already had on hand. We were running low on milk and I didn't want to complete deplete the supply before morning, so I supplemented the meager milk dose with a 1/4 cup of Greek yogurt, which gave the bechamel sauce a thick, creamy texture.

Once I had my mise en place, the cooking process extended at a lovely, leisurely place. The light over my stove. My cast-iron ably sizzling. Bam, turkey bacon! Bam, onions! Whisky-whisky, lil' bechamel sauce. I love this way too much.

Enough chatter. Here lie pictures.


Skillet Baked Mac with Spinach and Turkey Bacon
Serves 4.

8 oz. hollow pasta
3 tablespoons butter
2 tablespoons flour
1/2 cup milk
1/4 plain Greek yogurt
1/2 cup freshly grated Parmesan
4 oz. fresh mozzarella, roughly chopped or torn
Salt and pepper, to taste
2 slices turkey bacon, sliced thinly crosswise
1/4 cup of thinly sliced red onion
2 green onions, thinly sliced (reserve some for garnish)
1 large clove garlic, minced
1 tablespoon olive oil
4 oz. spinach
1 tablespoon dried dillweed
Breadcrumbs
Smoked paprika

1. Cook pasta, taking a minute or two off of package directions. Drain and run under cold water. Set aside.
2. Melt butter in medium saucepan. Add flour, whisking till smooth. Slowly drizzle in milk, still whisking constantly. Add Greek yogurt and continue to whisk. Once roux is smooth--with milk and yogurt fully incorporated--whisk in Parmesan and 3 oz. mozzarella. Season with salt, pepper, and nutmeg. Take off heat and set aside.
3. Place your trusty cast-iron (if you do not have a cast-iron skillet, you can substitute with...oh come on! you need cast-iron! But I guess a normal skillet will do for now...for now) over medium-high heat. Add bacon slices, pressing down as they cook to render fat. Once bacon is crisped (and smelling heavenly), remove from skillet and set aside.
4. Preheat oven to 350. Add red and green onions and garlic to skillet, shaking the pan as they cook so they don't stick. Drizzle in a little olive oil, then add spinach and dill. Cook until spinach is wilted down, adding more as you go.
5. Once all spinach is wilted, stir in sauce and cooked pasta. Top with remaining 1 oz. of mozzarella, then sprinkle with breadcrumbs. Bake in oven for 30 minutes, until golden and bubbling. Let cool for ten minutes, then sprinkle with smoked paprika and green onions and serve.

Tuesday, August 13, 2013

Polenta Torta with Grilled Zucchini and Corn


I've been reading Alice Waters' The Art of Simple Food, and I'm just enamored of her take on cooking. The use of fresh, quality ingredients. The careful handling and technique. The love of aromas, flavors, and even aesthetics. It's joyful and I love it.

I took Waters' recipe for the polenta torta, a layered dish of polenta, tomato sauce, and cheese, and added grilled summer vegetables and a salsa verde.

Salsa verde is so simple: chopped parsley, lemon zest, garlic, olive oil, salt, and pepper--allowed to sit and meld for a few hours to really strengthen the overall flavor. You can also add capers, anchovies, vinegar, etc., but I kept it simple (with the lemon zest providing the acidity that the vinegar would have.)


Then I made a flash-sauteed fresh cherry tomato sauce with basil and a kick of jalapeno.


The tart, garlicky taste of the salsa verde balanced well with the mellow basil and low heat of the cherry tomato sauce.

Then I just had to make the polenta and grill the vegetables.


Then I shucked the corn and stirred the vegetables into the polenta. After that, it was a simple matter of layering the polenta, sauces, and cheeses. I let the polenta set for at least thirty minutes (preferably longer, as mine wasn't quite as firm as I wanted when removed from the oven), then baked it for 30 minutes at 350, until it was hot and bubbling.

So there you have a summer dish packed with flavors and fresh vegetables! I served it alongside snapper en papillote and a salad of fresh red and green leaf lettuce with a red wine vinaigrette.

Polenta Torta with Grilled Zucchini and Corn
Serves 4 - 6.

Salsa Verde
Flash-Sauteed Fresh Cherry Tomato Sauce
4 cups water
1 cup yellow corn meal
2 ears corn
1 large zucchini, sliced
2 tablespoons olive oil
3/4 cup grated parmesan (or parmigiano-reggiano)
4 oz. fresh mozzarella, sliced

Salsa Verde
1/3 cup parsley, coarsely chopped
Zest from one lemon
1 clove garlic, minced
2 - 3 tablespoons olive oil
Sea salt
Freshly ground black pepper

Flash-Sauteed Fresh Cherry Tomato Sauce
2 1/2 cups cherry tomatos, halved
2 tablespoons jalapenos, diced
2 tablespoons olive oil
4 oz. basil chiffonade
1 tablespoons garlic powder

1. Combine salsa verde ingredients in a small bowl. Cover and refrigerate for at least one hour.
2. For tomato sauce, heat up 2 tablespoons olive oil in a large skillet. Add jalapeno and sautee, shaking the pan so the jalapeno doesn't stick, for 2 - 3 minutes, until tender and fragrant. Add tomatoes and garlic powder and continue to cook for 5 - 6 minutes until tomatoes burst and release juices. Take off heat and stir in basil chiffonade.
3. In a medium saucepan, bring 4 cups of water to boil. Stir in 1 cup yellow cornmeal and lower to a simmer. Continue to stir for 2 - 3 minutes until cornmeal remains suspended. Let cook, stirring occasionally, for approximately one hour. Polenta will be done after 20 - 30 minutes, but the additional time allows the flavor to strengthen.
4. In a grill pan, cook corn and zucchini slices until browned and tender. Stir grilled vegetables into polenta.
5. Grease a large earthenware baking dish. First add a third of the polenta and vegetable mixture.
6. Combine salsa verde and cherry tomato sauce and spread half over the polenta. Top with half the cheese. Add another third of the polenta mixture. Repeat layers of sauce and cheese. Finish off with the last of the polenta.
7. Let the polenta set for another 30 minutes--preferably in the fridge. Preheat oven to 350.
8. Cook polenta for 30 - 40 minutes, until hot and bubbling.


Sunday, July 21, 2013

No Place Like Home for the Challah Days


I was in the mood for a good bread today--the whole afternoon lay before me and I imagined it filled with delicious aromas and flour to my elbows.

Ultimately, this panned out (heh, heh, sorry.) Breadmaking takes a bit more time than your average recipe, even if you don't go the cold fermentation route. It can be extremely taxing on the heart to begin a bread recipe one day and be stalled by the directive: "Refrigerate overnight." Oof! I could not do that to myself. Not on a Sunday. So instead I opted for warm proofing.

But I'm getting ahead of myself!


Challah. An eggy bread similar to brioche. The baking process called for lots of waiting periods as the dough inched its way skyward, and I filled with time with pacing and Veronica Mars episodes.


The complications begin after the dough completes its first couple of rises. Then you must perform the braiding, which isn't that difficult once you have the steps down! I've seen a few methods on the internet, but here is the most straightforward and easiest. Thank you so much, fellow baker!

Simply separate the dough into six balls, then form those balls into strands about 12 inches long and 1 - 1 1/2 inches wide.


Place the strands parallel to each other and pinch them at the top to hold together.

Then braid!


Once both loaves are made, I brushed them generously with eggwash (using my brush to paint with the direction of each braid section), then let them rise for another hour before another eggwashing, followed by a sesame-seed-sprinkling.


Finally time to bake!


And enjoy!

Six-Strand Challah (adapted from Smitten Kitchen)
Makes 2 loaves.

1 3/4 cups lukewarm water
1 1/2 tablespoons active dry yeast
1 tablespoon, plus 1/2 cup granulated sugar
1/2 cup olive oil, plus more for greasing bowl and pan
5 large eggs
1 tablespoon table salt
8 cups flour
Sesame seeds for sprinkling

1. In a large bowl (or bowl to stand mixer if using), dissolve yeast and 1 tablespoon sugar in water.
2. Whisk in olive oil, then beat in 4 eggs (one at a time) before adding 1/2 cup sugar and salt.
3. Slowly add in flour, whisking as you go along. Once all the flour is added, use dough hook attachment of mixer, operating on the lowest speed, for about three minutes until smooth. Turn dough out onto floured surface and form into ball.
4. Clean out mixing bowl, grease the inside with olive oil, then return dough to bowl. Cover bowl with plastic wrap and proof for one hour in a warm area, until dough has doubled in size. (I heated my oven to 150 and then turned it off before placing bowl inside to proof.)
5. Uncover dough, punch down, then rewrap. Return to warm area for thirty minutes.
6. Uncover dough again. Divide dough in half. Starting with first half, form into six balls. Form each ball into a "rope" about 12 inches long and 1 - 1 1/2 inches long. Set strands parallel to one another, then pinch together at the top.
7. Begin to braid the strands. Take the rightmost strand and pull it over two strands, under one strand, then over the last two. Begin again with new rightmost strand. Over two, under one, over two. Continue--using rightmost strand each time--until dough is fully braided. Repeat process with second half of dough.
8. Place both loaves on a greased cookie sheet, at least two inches apart. Beat remaining egg and brush loaves generally with eggwash.
9. Let rise again for another hour. Then brush again with eggwash before sprinkling sesame seeds.
10. Preheat oven to 375. Bake for 30 - 40 minutes, until bread is deeply golden. Let cool on wire rack.