Showing posts with label Fruit. Show all posts

Sunday, January 25, 2015

Meyer Lemon and Sage Focaccia


I love spending a Sunday afternoon with dough. I've never been a big baker in terms of cupcakes and cookies, but playing around with breads is a blast. Focaccia is an easy one. One long proof (which I do warm for a relatively short time in a closed oven, rather than chilled for twelve hours in the fridge—yikes) and then a brief rise once its rolled out in the pan.

Using the same ingredient set from last year's Pesto and Mozzarella Focaccia, I made a few adjustments beyond changing the toppings. Rather than baking at 400 degrees for 15–20 minutes, I risked a 425 bake temp for 20 minutes. The outside was darker, with a crunchy, savory interior. Definitely an improvement.

Topped with thiiinly sliced lemons (blanched before sliced to cut down on the bitterness of the rind) and shredded fresh sage, drizzled olive oil, plus a sprinkling of sea salt and sugar. I can see myself remaking and tweaking toppings and sighing happily over this recipe for a long time.


Ingredients:
2 teaspoons rapid-rise dry yeast
1 cup water, warmed to about 115 degrees
2 tablespoons sugar
3 1/2 to 4 cups all-purpose flour
1 tablespoon kosher salt dissolved in 2 tablespoons water
1/4 cup extra-virgin olive oil, plus more for oiling the mixing bowl

For the topping:
2 tablespoons olive oil
2 organic Meyer lemons
6–8 sage leaves, torn to bits
2 tablespoons sugar
1 tablespoon sea salt


Method:

1. In the bowl of your standing mixer, combine the yeast, water, and sugar. Stir to dissolve, and let sit for 3 minutes, until foamy. With the mixer fitted with a dough hook, turn the mixer on low speed and slowly add 3 1/2 cups of flour to the yeast mixture. Add the dissolved salt (doesn’t have to be completely dissolved) and slowly pour in the olive oil. When the dough starts to come together, increase the speed to medium and mix for about 8-10 minutes, until dough is smooth and elastic. Add the remaining flour a tablespoon at a time if the dough is too sticky.

2. Turn the dough out onto a clean counter and knead a few times before forming the dough into a round ball. Place the dough ball into a large oiled bowl, turning it so that it is coated with olive oil. Leave the dough ball in the bowl and cover with plastic wrap. Let rise in a warm place for about 45 minutes, until the dough has doubled in size.

3. Meanwhile, fill a small saucepan with water and bring it to a boil. Add the whole lemons and blanch for 2–3 minutes. Drain and run under cold water. Then slice the lemons as thinly as possible and set aside.

4. Preheat oven to 425 degrees and coat a sheet pan with olive oil. Turn out the dough on your work surface. Roll and stretch the dough roughly into a rectangular shape; the dough should be about a 1/2 inch thick. Transfer the dough to the oiled sheet pan, cover with plastic wrap, and let sit for 15 minutes.

5. Uncover the dough and top with lemon slices and shredded sage. Drizzle olive oil on top and sprinkle with sea salt and sugar. Bake for around 20 minutes, until dough is dark brown and lemons have begun to brown around the edges too. Let cool on a wire rack for 5–10 minutes until serving.

Friday, July 5, 2013

Strawberry Pecan Bread


It was difficult not to dance and bow before my oven as this baked...that's how delicious the smell was.

I'm still breaking in my new apartment kitchen. It's a tad smaller than my old place, but the gas stove/oven and general non-broken-downedness of the place does do wonders. And this was my first use of the oven, generating heavenly aromas as the loaf pans basked into perfection.

Strawberries  are such a gift. I want to find a way to incorporate them into every recipe, but then I guess they wouldn't be so special.


Folding these darlings into the batter was like swaddling your child in a blanket and dropping him off at daycare. Here, daycare is a bakery. Warm, cozy, your kid probably comes home with a great tan. Just the usual child-tending hullabaloo.


[Side salad: my new kitchen as a skylight and I'm so happy. The old place involved a constant battle with awful, yellow dull light.

At last I was able to combine the senses and enjoy both the smell, look, and taste of this marvelous creation.


Then the struggle became not eating it all before dinner...

Strawberry Pecan Bread (adapted from Farm Fresh Southern Cooking)
Makes 2 loaves.

3 cups flour
2 cups sugar
1 tablespoon ground cinnamon
1 teaspoon baking soda
1 teaspoon salt
4 eggs, lightly beaten
1 1/4 cup vegetable (or neutral) oil
2 cups hulled and diced strawberries
1 cup chopped pecans 

1. Preheat the oven to 350. Lightly grease two loaf pans and set aside.
2. In a large bowl, mix together flour, sugar, cinnamon, baking soda, and salt. Whisk in beaten eggs and oil. Fold in strawberries and pecans.
3. Pour batter into loaf pans. Put in oven and bake for one hour (or until top is golden and toothpick inserted in center comes out clean.)
4. Cool completely, slice, and serve. (I didn't make it through the cool completely part. It still works!)

Note: The bread freezes terrifically. If you're cool with saving it for later!

Tuesday, April 16, 2013

Making and Canning Strawberry-Rhubarb Jam


[Disclaimer: I am about to ramble. I will clearly mark the end of the ramble. You are welcome to skip my musings!]

With any skill set, you are bound to hit plateaus--long stretches where you worry that you're not doing anything different or more exciting. Where you start to get antsy or tired of this activity to which you've dedicated so much of your time, not because you no longer love the activity, but because you have not provided yourself with new challenges (or scenery, so to speak.)

I adore cooking. I could never have imagined how much it would change and enlighten me when I got the bug a few years ago. It started off as a date night activity with the guy I had just started to see, and now three years later, he's still right here with me, ensuring I don't undercook the chicken and producing plenty of dishes on his own. It might be true that at the start of my journey, I thought "oregano" was how Italians spoke of that state in the Pacific Northwest. Now I must say I'm a bit wiser.

But still I need to continue to grow and shoot for loftier goals, especially because with my packed schedule cooking can seem on the rarest occasions like a chore. I can't let that happen!

I would love to make my own seasoning mixture. Start a garden. Write a cookbook. Increase my originality in the kitchen. Read whole books on the science of cooking and fully understand what exactly I'm doing to these poor animals and vegetables.

For now, though, I did pick up the new techniques of jamming and canning, and I am anxious to push myself more.

END RAMBLE.

So to continue with my seasonal blog adherence--which is now in week 5!--I tackled rhubarb for the first time. It is not just a non-descript foodstuff that might have been mentioned by Laura Ingalls Wilder! It's a vibrant, tangy stalk complemented with sugary perfection by the strawberry.


For the rhubarb, you must be careful to trim it properly. The roots and leaves are poisonous. Do not poison people with your jam. It would leave a bad taste in their mouths. And possibly kill them. Please refrain.

Do not fret about the peel, though! It may come off a little as your dicing, but it is completely safe to cook your jam with rhubarb peel included. It's my understanding that the peel cooks down along with the rhubarb.


The fruit cooks for an hour or so, jamming all the while. (I invited my boyfriend to play guitar during the process. "You can jam while I can jam." I am a delight.)


When the jam was about halfway done, I started preparing my cans. The large pot of water took its sweet time boiling, but I expected nothing less.


Once the cans and lids were sterilized, I set them on a clean dish towel and quickly scooped in the now-done jam. While the timing doesn't have to be right on the nose, you want the jars to still be pretty warm when you add the hot jam.

Then I sealed the jars tightly and added them back into the boiling water.


After which they sadistically needed to cool for 24 hours before we could enjoy.

We bravely translated this setback into breakfast for supper.


Making and Canning Strawberry-Rhubarb Jam
Makes 3 8-oz. jars

1 1/4 lb. rhubarb, trimmed and diced
2 cups strawberries (about 8 oz.), hulled and quartered
2 1/4 cups sugar
1 tablespoon fresh-squeezed lemon juice
3 8-oz. canning jars (must have rings and lids)

1. Combine rhubarb, strawberries, sugar, and lemon juice in a large saucepan. Bring to a boil, then reduce heat to medium-low and cook for one hour, stirring occasionally.
2. About thirty minutes in, heat up large pot of water to boil. Unscrew lids from jars and add jars, rings, and lids to boiling water using tongs. Sterilize for ten minutes, then remove all items to a clean dish towel.
3. When jam is done, scoop immediately into still-warm jars. Seal jars and return to pot of boiling water, setting them upright at the bottom of the pot. Boil for 10 minutes. Return jars to clean dish towel and let cool for 24 hours.
4. After 24 hours have passed, test that the jar is sealed by removing the ring (but not the lid). Press down on the top of the lid with your index finger. If the lid springs back, it is not properly sealed. It should appear slightly concave.
5. Give jars clever titles and enjoy wowing your friends with your endless puns.

Sunday, July 1, 2012

Blueberry Pie


Nothing like a long day at work to make you crave pie! I wanted something summery, sweet, and fresh to tickle my palate, and this concoction slid with easy grace into my heart.

I love Cook's Illustrated recipes for the background information and notes they give on their choices throughout the cooking process. It's enormously educational and has the added benefit of making me feel like a scientist. (Does Bill Nye have cookbooks?)

The crust came first. I placed salt, sugar, and 1 1/2 cups of the flour in the bowl of my food processor and combined them with a few quick pulses. Then I removed the butter and shortening from the freezer, where I'd placed them several minutes previously to get cold. I cut a stick and a half of butter into 1/4-inch pieces and scooped out 1/2 cup of shortening and quartered that.

I added these to the flour mixture and processed for 15 - 20 seconds until the dough was smooth, at which point I poured another cup of flour into the bowl and pulsed it into Sameness. Using a rubber spatula, I scooped the dough (which at this point should be smooth and tacky, but not overly sticky) into a medium bowl. There I sprinkled it with 1/4 cup vodka and then a 1/4 cup water. After all the liquid was added, I molded the dough with my hands, kneading it together until the water was fully incorporated. Then I divided the dough in two and formed each half into a 4-inch disk. The disks were then wrapped in plastic and placed in the refrigerator for thirty minutes.

I took out one of the disks and rolling it out on a floured work surface, pressing and spreading it till it was about 12 inches in diameter. Then I carefully transferred the base into my pie pan, allowing for at least a 1-inch overhang (though I did not achieve quite this all the way around.)


Then the time had dawned to construct the fabulous filling. I emptied three cups of berries into a medium saucepan and set the heat to medium.


The berries cooked for about 8-9 minutes. All the while, I used a potato masher to press down and juice the little buggers.


Once the juice had reduced and started to thicken, I took the berries off heat. In a medium bowl, I combined the other three cups of berries, grated apple, lemon zest, lemon juice, tapioca, sugar, and a pinch of salt. Then I poured in the cooked berries and their juices and stirred it all well to combine.

I set the oven to 400 and placed a rimmed pan on the lowest rack of the oven to heat up, and then I removed the pie pan from the refrigerator and slowly filled it with aromatic goodness.


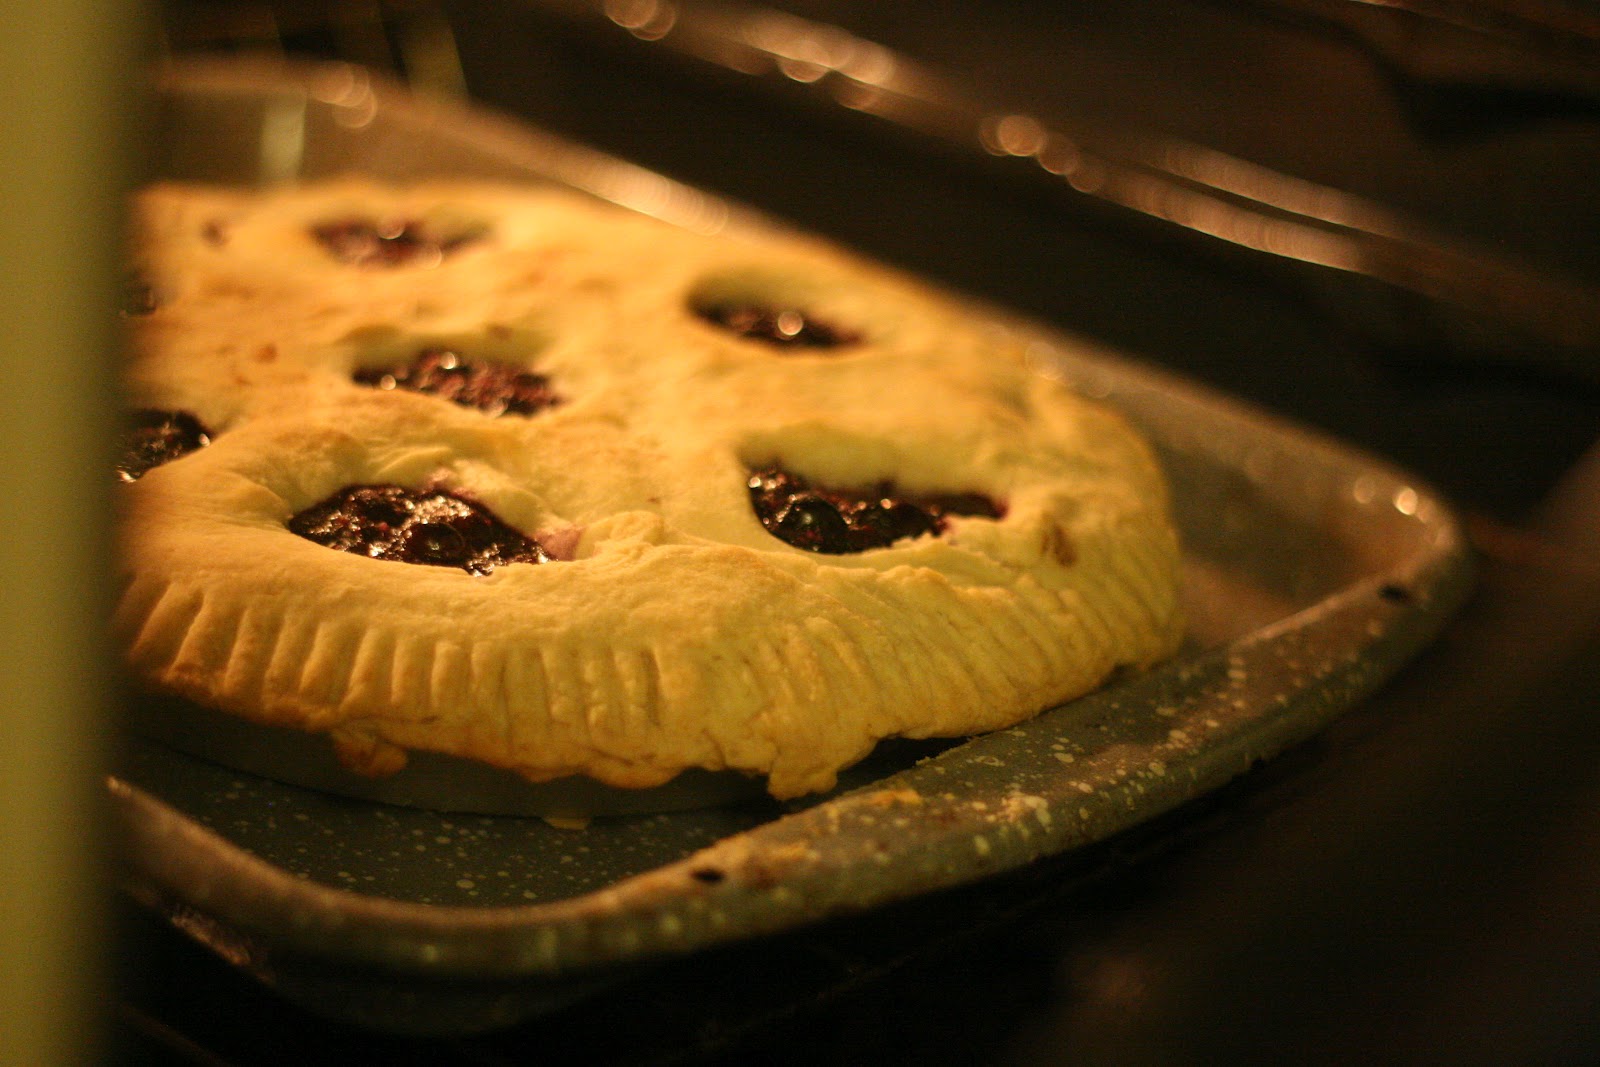
Then I removed the other disk of dough from the refrigerator and rolled it out circularly into a 11-inch diameter. I took my tablespoon and--hollow-side down--pressed it into the middle of the circle, turning it slightly and pressing down again until I had a full circle cut-out. I removed the flat circle and repeated the process six times in a circle around the original cut-out, making each no less than 1.5 inches from the edge.


I scattered butter pieces over the filling of the pie, and then I draped the now-perforated circle loosely over my rolling pin and laid it out over the top of the pie pan. I pressed the bottom of a fork around the edges of the pie to seal the borders and create ridges in the crust.

I should have brushed the pie with the egg wash at this point, but I completely forgot. Still delicious! But I'll remember the next time. Even took out the egg and everything...


I placed the pie on the heated pan in the oven and cooked it for thirty minutes, at which time I lowered the temperature to 350 and cooked it for another 30-40 minutes until the crust was a golden-brown

Mid-bake. I couldn't  resist.
.Then once it had achieved the desired hue, I put the pie on a cooling rack and placed it in the refrigerator for about an hour, until it had cooled to room temperature.


There you have it! Pie...oh, my.

Blueberry Pie (from Cook's Illustrated)


Crust
2 1/2 cups unbleached, all-purpose flour (and more for work surface)
1 teaspoon table salt
2 tablespoons sugar
12 tablespoons unsalted butter, cold (1 1/2 sticks), chopped into 1/4-inch pieces
1/2 cup vegetable shortening, cold, divided into 4 pieces
1/4 cup vodka (for texture, don't substitute)
1/4 cup water


Filling
6 cups fresh blueberries (or frozen and thawed)
2 teaspoons lemon zest
2 teaspoons fresh lemon juice
2 tablespoons quick-cooking tapioca, ground
1 Granny Smith apple, peeled and grated, wrung dry in dish towel
1 pinch table salt
3/4 cup sugar
2 tablespoons butter, cut into 1/4 inch pieces


1 large egg, lightly beaten with 1 teaspoon water for egg wash


Monday, August 29, 2011

Summer Peach Cake

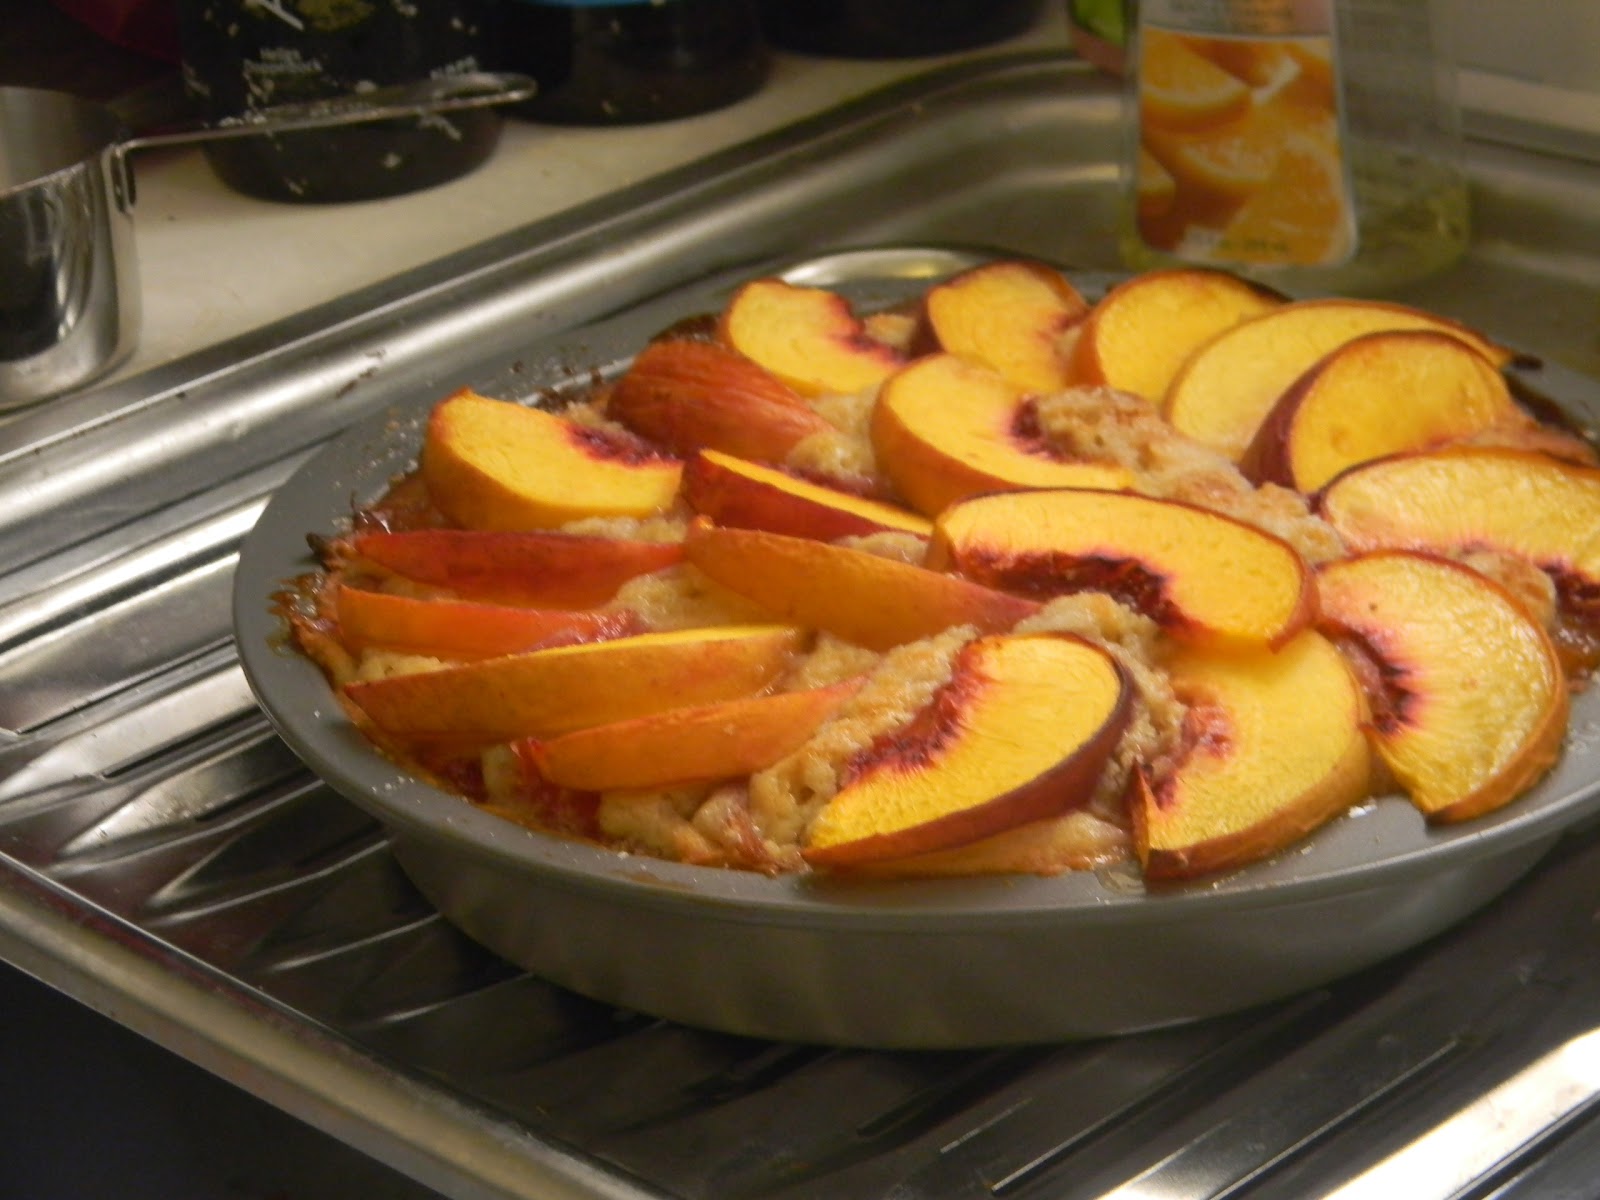
Eat the pain away.
Before making the delectable circle of peachy goodness displayed above, the closest I'd come to making a cake from scratch was getting the portions wrong on a box of red velvet cake mix and--with a little bit of feverish, not-exactly-detail-oriented improvising--somehow producing something edible.

(Side salad: the combination of staring at that picture and being hungry incited me to get up from the couch and procure leftovers from the fridge. Still delicious!)

This was a little nerve-wracking. I'm not very adept with baking and flour and whatnot all the time. When I made Beef Wellington, I ended up practically painting on the dough, but that's neither here nor there (though that tear-inducing, ultimately-not-disastrous adventure would have made for a heart-stopping post...sponsored by the good folks at Hyphen-City.)

I went to the neighborhood market and picked up my ingredients, including peaches (obviously) and peach schnapps. Cooks Illustrated recommends macerating the peaches in sugar, schnapps, and a little bit of lemon juice to enhance the flavor.

First I preheated my oven to 425 deg, then I chopped up the peaches into roughly 1/2 inch wedges.


Then I set aside about 24 of those and cut the rest of the wedges into thirds. Everything got all macerated, and then I spread the peach chunks (not the elite 24) in a single layer on a pan wrapped in foil and misted with Pam.

Baked the chunks for 20-25 minutes. Here's where Lucie got antsy, because once the baking finished, I had to cool the chunks to room temperature on my makeshift wire rack for 30 minutes. And all I wanted to do honestly is get that cake in the oven so I could eat it in time for work.

Whenever you feel is a good time for you personally, as a human being undertaking this recipe, to start making the batter, you go ahead and do that. But probably don't wait too long. Use your judgment.

I whisked together flour, baking powder, and salt. Then I peeled the label off my new cake pan and Pammed it. Then I remembered I had to melt the butter and cool it completely, so I'm glad I started in on the batter before the peaches were even out of the oven.

(Once you do pull the peaches out, reduce the oven temp to 350 and applaud yourself on being well on way your way to the world of good eating.)

In another bowl, I whisked together eggs, brown sugar, and 1/3 cup of granulated sugar until it was nice and smooth. To that I added sour cream, vanilla extract, and 1/4 tsp of the almond extract. As my peaches cooled, I happily combined the two batter bowls into one delicious batter. I strove heroically to save most of the batter for the cake and to stop being an overzealous "taste-tester."

Peach time! First I crushed up some panko and tossed the peach chunks. Next I poured half the batter into my pan and smoothed it over with a spatula, then added the recently-cooled peach chunks, pressing them down into a single layer. Poured in the rest of the batter. Then I took the reserved wedges and placed them in a circle atop the batter. Then I realized I had them facing the wrong way, so I jumped in for a quick amendment before adding the rest of the sugar, moistened with 1/8 tsp of almond extract, to the top of the cake.

Then with my eyes large and proud with hunger, I put the cake in the oven for about an hour.


After retrieving the cake from the oven, I was forced to watch it cool for two to three hours (I compressed the wait with a little freezer time, so I could enjoy a slice before work.)

And voila! Summer peach cake and a dwindling of my baking fear.

Summer Peach Cake (via Cooks Illustrated)


  • 2 1/2pounds peaches , pitted and cut into 1/2 inch-thick wedges
  • 5tablespoons peach schnapps
  • 4teaspoons lemon juice
  • 6tablespoons plus 1/3 cup granulated sugar
  • 1cup (5 ounces) all-purpose flour
  • 1 1/4teaspoons baking powder
  • 3/4teaspoon salt
  • 1/2cup packed (3 1/2 ounces) light brown sugar
  • 2large eggs
  • 8tablespoons unsalted butter , melted and cooled
  • 1/4cup sour cream
  • 1 1/2teaspoons vanilla extract
  • 1/4teaspoon plus 1/8 teaspoon almond extract
  • 1/3cup panko bread crumbs , finely crushed