Showing posts with label Pastry. Show all posts

Sunday, December 2, 2012

Mahjouba (Algerian Crepes)


It's the weekend, which means I actually have time to cook!

Last night we went to Texas de Brazil, that glorious house of delicious steak bites and Parmesan chicken and garlic-crusted pork and an unfairly vast salad bar. We kind of jumped the gun on celebrating Andy's graduation, Christmas, and two and a half years together (which have been amazing, and I absolutely can't wait for whatever's next.)

But this evening I rejoiced in cooking for myself again.

I saw this recipe on Saveur.com, and I set out to recreate it as best I could with the help of Fresh Market. I was unable to find semolina or red Holland chiles, but I substituted brown rice flour and Anaheim green peppers.

I began by chopping up the onions, carrots, and chile.


Then I put the mixture into my food processor and chopped the vegetables up until they were finely processed.


I heated up three tablespoons of olive oil in a large skillet over medium-high and added the vegetable mixture. I cooked them, stirring often, for about twenty minutes--until all the components were very soft and tender.

Then I stirred in the tomato paste. After a few minutes, I added the freshly crushed tomatoes to the mixture. I continued to cook in a very stirry fashion for about forty to forty-five minutes.


Meanwhile, I made the crepe dough. I combined the rice flour, salt, and water in a bowl, kneading it together in a large ball. I then formed six smaller balls out of the motherlode.


I froze four of these balls--planning to make more crepes soon with different fillings! One with ham, swiss, dijon, and a bechamel sauce sounds absolutely delicious--and let the others rest under loosely draped plastic wrap for thirty minutes.

Once the filling was done caramelizing, I stirred in the chopped cilantro and set it aside to cool.


I took the dough balls one at a time and placed them on a (highly) floured work surface, sprinkling more flour on top, because these buggers were sticky.

I used the heel of my palm to press the dough out, flattening it into a vague rectangle about 10x12.

Mid-pressing. I would never commit any dough-wielding crimes, because the fingerprints would be a nightmare.
Once the dough was fully spread out and paper-thin, I placed 1/2 cup of filling in the center and spread it into a smaller rectangle.

I then gently lifted the long sides of the rectangle with a flour-dusted pastry cutter and folded them over the filling.


Then I folded over the shorter sides. I heated up a 12" skillet to medium and carefully placed the crepe seam-side down, toasting it for about eight minutes on each side.


And here we have it! A nice, fairly healthy and exotic Sunday night dinner!

Mahjouba (Algerian Crepes)

Filling:
2 medium yellow onions, chopped
2 carrots, chopped
1 Anaheim pepper, de-stemmed, de-seeded, and chopped
2 tablespoons tomato paste
1 14-oz can whole, peeled tomatoes

Dough:
3 cups brown rice flour
1 3/4 cups water
2 tablespoons salt


Sunday, July 1, 2012

Blueberry Pie


Nothing like a long day at work to make you crave pie! I wanted something summery, sweet, and fresh to tickle my palate, and this concoction slid with easy grace into my heart.

I love Cook's Illustrated recipes for the background information and notes they give on their choices throughout the cooking process. It's enormously educational and has the added benefit of making me feel like a scientist. (Does Bill Nye have cookbooks?)

The crust came first. I placed salt, sugar, and 1 1/2 cups of the flour in the bowl of my food processor and combined them with a few quick pulses. Then I removed the butter and shortening from the freezer, where I'd placed them several minutes previously to get cold. I cut a stick and a half of butter into 1/4-inch pieces and scooped out 1/2 cup of shortening and quartered that.

I added these to the flour mixture and processed for 15 - 20 seconds until the dough was smooth, at which point I poured another cup of flour into the bowl and pulsed it into Sameness. Using a rubber spatula, I scooped the dough (which at this point should be smooth and tacky, but not overly sticky) into a medium bowl. There I sprinkled it with 1/4 cup vodka and then a 1/4 cup water. After all the liquid was added, I molded the dough with my hands, kneading it together until the water was fully incorporated. Then I divided the dough in two and formed each half into a 4-inch disk. The disks were then wrapped in plastic and placed in the refrigerator for thirty minutes.

I took out one of the disks and rolling it out on a floured work surface, pressing and spreading it till it was about 12 inches in diameter. Then I carefully transferred the base into my pie pan, allowing for at least a 1-inch overhang (though I did not achieve quite this all the way around.)


Then the time had dawned to construct the fabulous filling. I emptied three cups of berries into a medium saucepan and set the heat to medium.


The berries cooked for about 8-9 minutes. All the while, I used a potato masher to press down and juice the little buggers.


Once the juice had reduced and started to thicken, I took the berries off heat. In a medium bowl, I combined the other three cups of berries, grated apple, lemon zest, lemon juice, tapioca, sugar, and a pinch of salt. Then I poured in the cooked berries and their juices and stirred it all well to combine.

I set the oven to 400 and placed a rimmed pan on the lowest rack of the oven to heat up, and then I removed the pie pan from the refrigerator and slowly filled it with aromatic goodness.


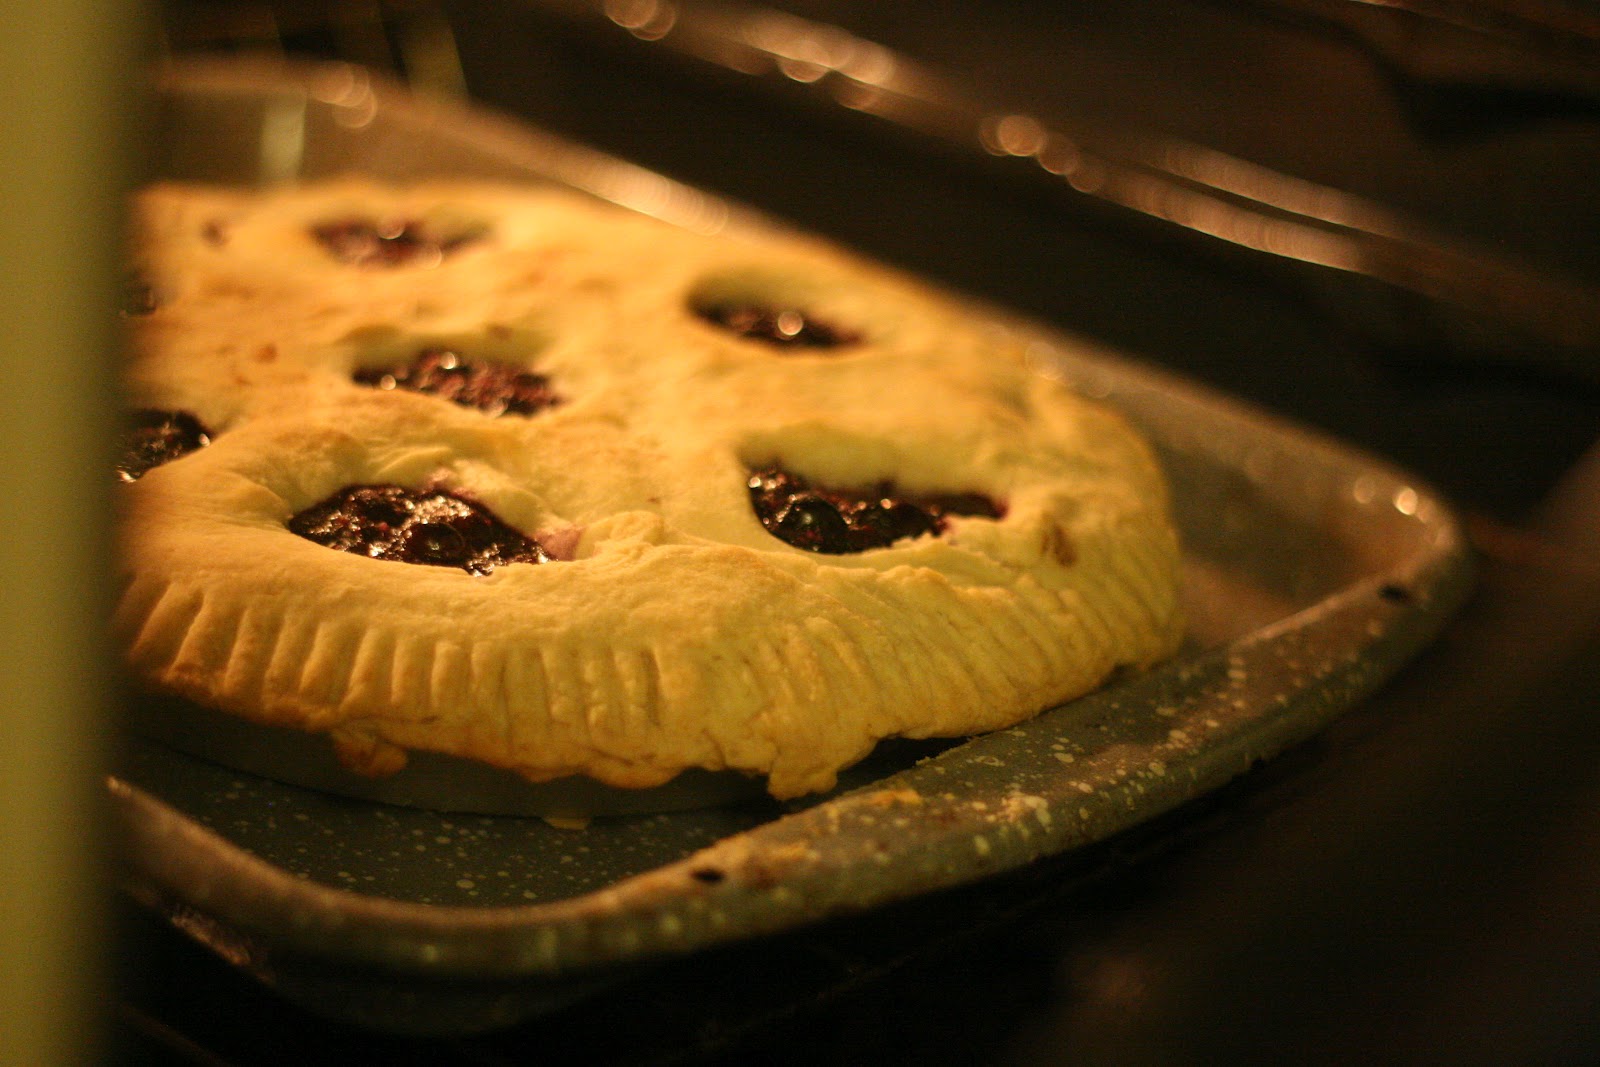
Then I removed the other disk of dough from the refrigerator and rolled it out circularly into a 11-inch diameter. I took my tablespoon and--hollow-side down--pressed it into the middle of the circle, turning it slightly and pressing down again until I had a full circle cut-out. I removed the flat circle and repeated the process six times in a circle around the original cut-out, making each no less than 1.5 inches from the edge.


I scattered butter pieces over the filling of the pie, and then I draped the now-perforated circle loosely over my rolling pin and laid it out over the top of the pie pan. I pressed the bottom of a fork around the edges of the pie to seal the borders and create ridges in the crust.

I should have brushed the pie with the egg wash at this point, but I completely forgot. Still delicious! But I'll remember the next time. Even took out the egg and everything...


I placed the pie on the heated pan in the oven and cooked it for thirty minutes, at which time I lowered the temperature to 350 and cooked it for another 30-40 minutes until the crust was a golden-brown

Mid-bake. I couldn't  resist.
.Then once it had achieved the desired hue, I put the pie on a cooling rack and placed it in the refrigerator for about an hour, until it had cooled to room temperature.


There you have it! Pie...oh, my.

Blueberry Pie (from Cook's Illustrated)


Crust
2 1/2 cups unbleached, all-purpose flour (and more for work surface)
1 teaspoon table salt
2 tablespoons sugar
12 tablespoons unsalted butter, cold (1 1/2 sticks), chopped into 1/4-inch pieces
1/2 cup vegetable shortening, cold, divided into 4 pieces
1/4 cup vodka (for texture, don't substitute)
1/4 cup water


Filling
6 cups fresh blueberries (or frozen and thawed)
2 teaspoons lemon zest
2 teaspoons fresh lemon juice
2 tablespoons quick-cooking tapioca, ground
1 Granny Smith apple, peeled and grated, wrung dry in dish towel
1 pinch table salt
3/4 cup sugar
2 tablespoons butter, cut into 1/4 inch pieces


1 large egg, lightly beaten with 1 teaspoon water for egg wash


Thursday, March 22, 2012

Homemade Croissants


Bonjour! For my birthday, my lovely older sister gave me Peter Reinhart's Artisan Breads Every Day. The book is brilliant. It somehow enables even the clumsiest bakers (such as myself) to produce glowing and edible goodies such as the ones pictured above.

The croissant consists of two basic parts: the detrempe and the butter block. I made the detrempe a day ahead. First I whisked together flour, salt, sugar, and yeast in a large mixing bowl. To this concoction I added milk and water, then finally the melted butter. I poured the butter in slowly and used a steady whisking to incorporate the drizzle.

Then I plugged in my hand mixer (with paddle attachments) and worked it through the flour mixture on the lowest speed for a minute. I scraped the dough down from the sides of the bowl, then kept mixing at the low setting for another 30 seconds. Reinhart says the dough should be "coarse, wet and shaggy." If it's too dry, splash in a little water. Too wet? Add flour.

When my dough was the perfect texture, I amped up the mixer to medium-high for fifteen seconds, until the dough seemed more coherent, not falling apart in the churning of the mixer.

I rolled the dough out onto a large, lightly floured cutting board and shaped it by hand--don't you love playing around with dough? If you've got an apron on and no pressing reason to go near your laptop, that is--into a large ball.


I grabbed another somewhat-large mixing bowl and poured a little vegetable oil in the bottom, then swirled the bowl around to coat the sides.

Then I hefted the large dough-ball into the bowl and covered the top with plastic wrap. Miraculously, it was able to take shelter in my fridge, where it stayed overnight.

It was about 24 hours later when I returned to my croissant project. I began by moving my three sticks of butter from the refrigerator to the freezer for about 20 minutes.

I then took the butter and chopped it into sixteen pieces. I took one of the many large mixing bowls I've been forced to amass and added the butter in with two tablespoons of flour.

Make sure you do a load of dishes between detrempe day and butter block day. That might be your style anyhow, but I realized belatedly I would need the hand mixer paddles festering in my sink and was setback about thirty minutes while they were sanitized.

Anyway! I used the aforementioned handmixer on a low setting at first, which made the butter look like it was shedding. I used a silicone spatula to scrape the mixture down from the sides, then kept mixing until the butter and flour started to become one. As with the detrempe, I raised the speed until the flour and butter came fully together to form a lumpless paste.

I then turned the butter out onto a large piece of parchment paper mister with cooking spray. I gave the butter a spritz of Pam as well before covering it with plastic wrap. With the help of my dough scraper, I formed the butter into a perfect six-inch square, 1/2-inch thick and smoothed on top.

Mmmm, healthy living.
Now was the time to return the detrempe to the thrilling world of room-temperature. Thanks to the oil, I easily slid the dough-ball from the bowl and onto my lightly-floured-work-surface.

After sprinkling it with flour, I rolled out the dough until it was a rectangle 12.5 inches wide and 6.5 inches long. I then flipped the butter block from the parchment paper onto the left half of the rectangle, situating it until left with a 1/4-inch border on the top, bottom, and left sides.


I lifted the right side of the rectangle and laid it flat on the butter block, crimping the edges in order to envelop the filling.

The next step in the process is called lamination. My last experience with lamination was abusing the machine at my fathers office to preserve my well-done crossword puzzles and favorite Marmaduke cartoons, but this was something different. I am revealing this now because I believe we have surpassed the statute of laminations.

I lifted the dough on each side to sprinkle more flour beneath--you do not want this dough snagging during the delicate lamination process. Then I rolled out the dough--using a firm but not overly-pressured hand--into a rectangle 9 inches long and 16 inches wide. Get used to these measurements, you will use them quite a few times in the upcoming steps. For the rolling-out process, Reinhart recommends starting from the center and pushing out to the corners, then pushing out from the center to the sides. If the dough begins to struggle or snap back into place, let it rest a few minutes before attempting again. For the most part, it's a nice, obedient dough.

Once I reached the coveted size, I used my dough scraper to form the corners into actual points, rather than rounded approximations.

I then folded the dough as you would a letter before stuffing it into an envelope.


The dough rested, covered loosely in plastic wrap, for twenty minutes at room temperature (most of this I occupied by washing my hands and taking pictures of the little beauty.)

Then I rolled it out again, with the closed edge of the "letter" facing me, to--you guessed it!--a 16-in x 9-in rectangle. I folded it letter-style, covered it in plastic wrap, and let it rest this time in the refrigerator--as Reinhart directs if you notice your butter is getting too soft.

I rolled the dough out one more time to the regular rectangle. After a twenty-minute-refrigeration, I returned the dough to the floured counter--first ensuring that I had room enough to roll out a rectangle 24-28 in. wide and 9 in. long. You've hit the big-time!

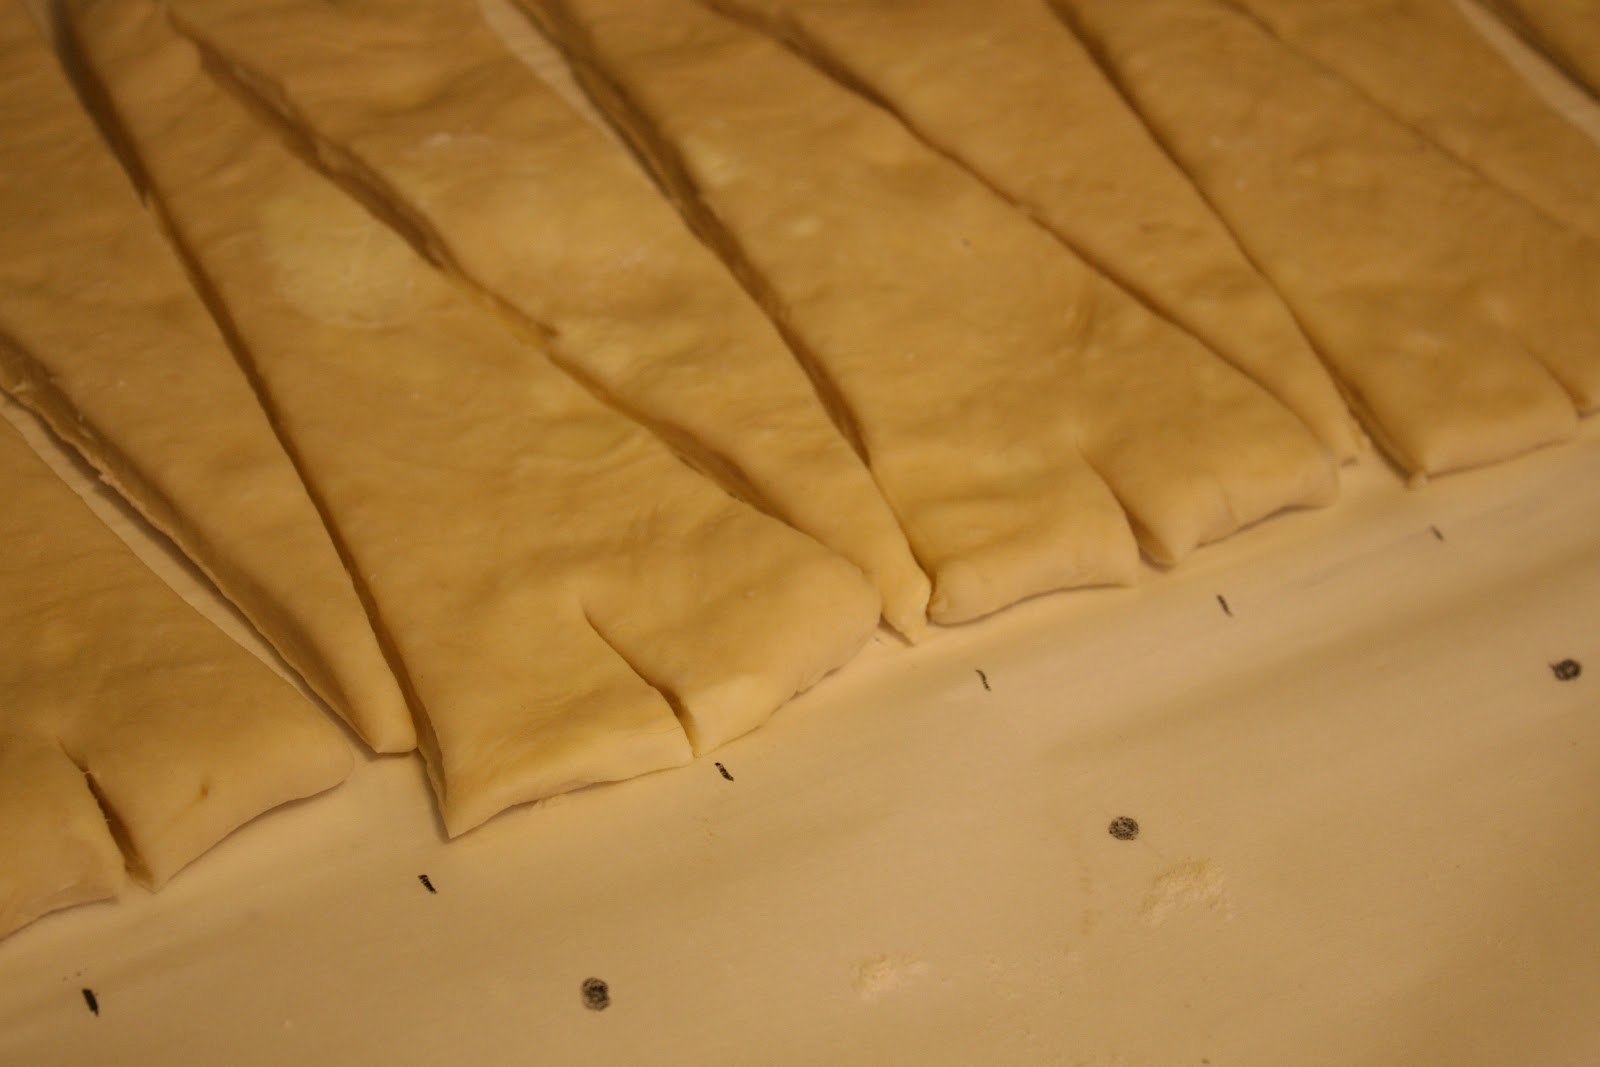
When I had stretched the dough out to this length, I used the ruler on my dough scraper to measure and mark every 4 inches along the bottom of the rectangle. Then at the top, I started measuring from two inches in--again marking every four inches with a dot.

The dashes are from the first time I tried measuring and I messed up...
Once the dots were all in place, I used the scraper to cut triangles out of the dough, slicing from a dot at the bottom to its equivalent at the top. This produced a series of triangles approximately 8 inches long with a 4-inch base (the length would shrink once it was cut out from the dough.)

Then at the center of each 4-inch base, I cut a 1-inch notch into the bottom.

Like mini-Eiffel Towers! Appropriate, non?

I then spread these notches wide, like wings, and rolled them up toward the point of the triangle, pulling on the point to elongate each roll.

These rolls should form anywhere from 5-7 "steps." If you wish to have more, you can twist the edges of each croissant.

Not a Pillsbury can in sight!
After the croissants were rolled up, I placed them on two sheet pans lined with parchment paper. Then I underwent another waiting period of 2.5 hours. Talk about Hunger Games...

Twenty minutes before I was ready to bake, I preheated the oven to 450. Ten minutes later, I created an egg wash with two egg yolks and two tablespoons of water beaten together. I brushed this over each croissant to give it a certain sheen (who wouldn't want their croissants to be Winning?).

I put the pans in the oven, immediately lowering the heat to 375. The croissants baked for thirty minutes total--though I rotated the pans halfway through. About ten minutes before they were done cooking, I noticed a few of the croissants getting fairly dark, so I lowered the heat to 330 to let them finish out their days.

And I still had to wait to eat these bad boys...damn you, baking!

 Finally after waiting 45 minutes (more like 37...) for the croissants to cool, we were able to dig in. Light, flaky, and scrumptious! (All things you do not want your scalp to be!)

Homemade Croissants (from Peter Reinhart's Artisan Breads Every Day)

DETREMPE
4 2/3 cups unbleached bread or all-purpose flour
1 3/4 teaspoons salt, or 2 1/2 teaspoons coarse kosher salt
1/4 cup sugar
1 tablespoon instant yeast
3/4 cup plus 2 tablespoons cold whole or low-fat milk
1 cup cool water
2 tablespoons unsalted butter, melted or at room temperature

BUTTER BLOCK
1 1/2 cups cold unsalted butter
2 tablespoons unbleached bread or all-purpose flour

Bon appetit!

Monday, August 29, 2011

Summer Peach Cake

Eat the pain away.
Before making the delectable circle of peachy goodness displayed above, the closest I'd come to making a cake from scratch was getting the portions wrong on a box of red velvet cake mix and--with a little bit of feverish, not-exactly-detail-oriented improvising--somehow producing something edible.

(Side salad: the combination of staring at that picture and being hungry incited me to get up from the couch and procure leftovers from the fridge. Still delicious!)

This was a little nerve-wracking. I'm not very adept with baking and flour and whatnot all the time. When I made Beef Wellington, I ended up practically painting on the dough, but that's neither here nor there (though that tear-inducing, ultimately-not-disastrous adventure would have made for a heart-stopping post...sponsored by the good folks at Hyphen-City.)

I went to the neighborhood market and picked up my ingredients, including peaches (obviously) and peach schnapps. Cooks Illustrated recommends macerating the peaches in sugar, schnapps, and a little bit of lemon juice to enhance the flavor.

First I preheated my oven to 425 deg, then I chopped up the peaches into roughly 1/2 inch wedges.


Then I set aside about 24 of those and cut the rest of the wedges into thirds. Everything got all macerated, and then I spread the peach chunks (not the elite 24) in a single layer on a pan wrapped in foil and misted with Pam.

Baked the chunks for 20-25 minutes. Here's where Lucie got antsy, because once the baking finished, I had to cool the chunks to room temperature on my makeshift wire rack for 30 minutes. And all I wanted to do honestly is get that cake in the oven so I could eat it in time for work.

Whenever you feel is a good time for you personally, as a human being undertaking this recipe, to start making the batter, you go ahead and do that. But probably don't wait too long. Use your judgment.

I whisked together flour, baking powder, and salt. Then I peeled the label off my new cake pan and Pammed it. Then I remembered I had to melt the butter and cool it completely, so I'm glad I started in on the batter before the peaches were even out of the oven.

(Once you do pull the peaches out, reduce the oven temp to 350 and applaud yourself on being well on way your way to the world of good eating.)

In another bowl, I whisked together eggs, brown sugar, and 1/3 cup of granulated sugar until it was nice and smooth. To that I added sour cream, vanilla extract, and 1/4 tsp of the almond extract. As my peaches cooled, I happily combined the two batter bowls into one delicious batter. I strove heroically to save most of the batter for the cake and to stop being an overzealous "taste-tester."

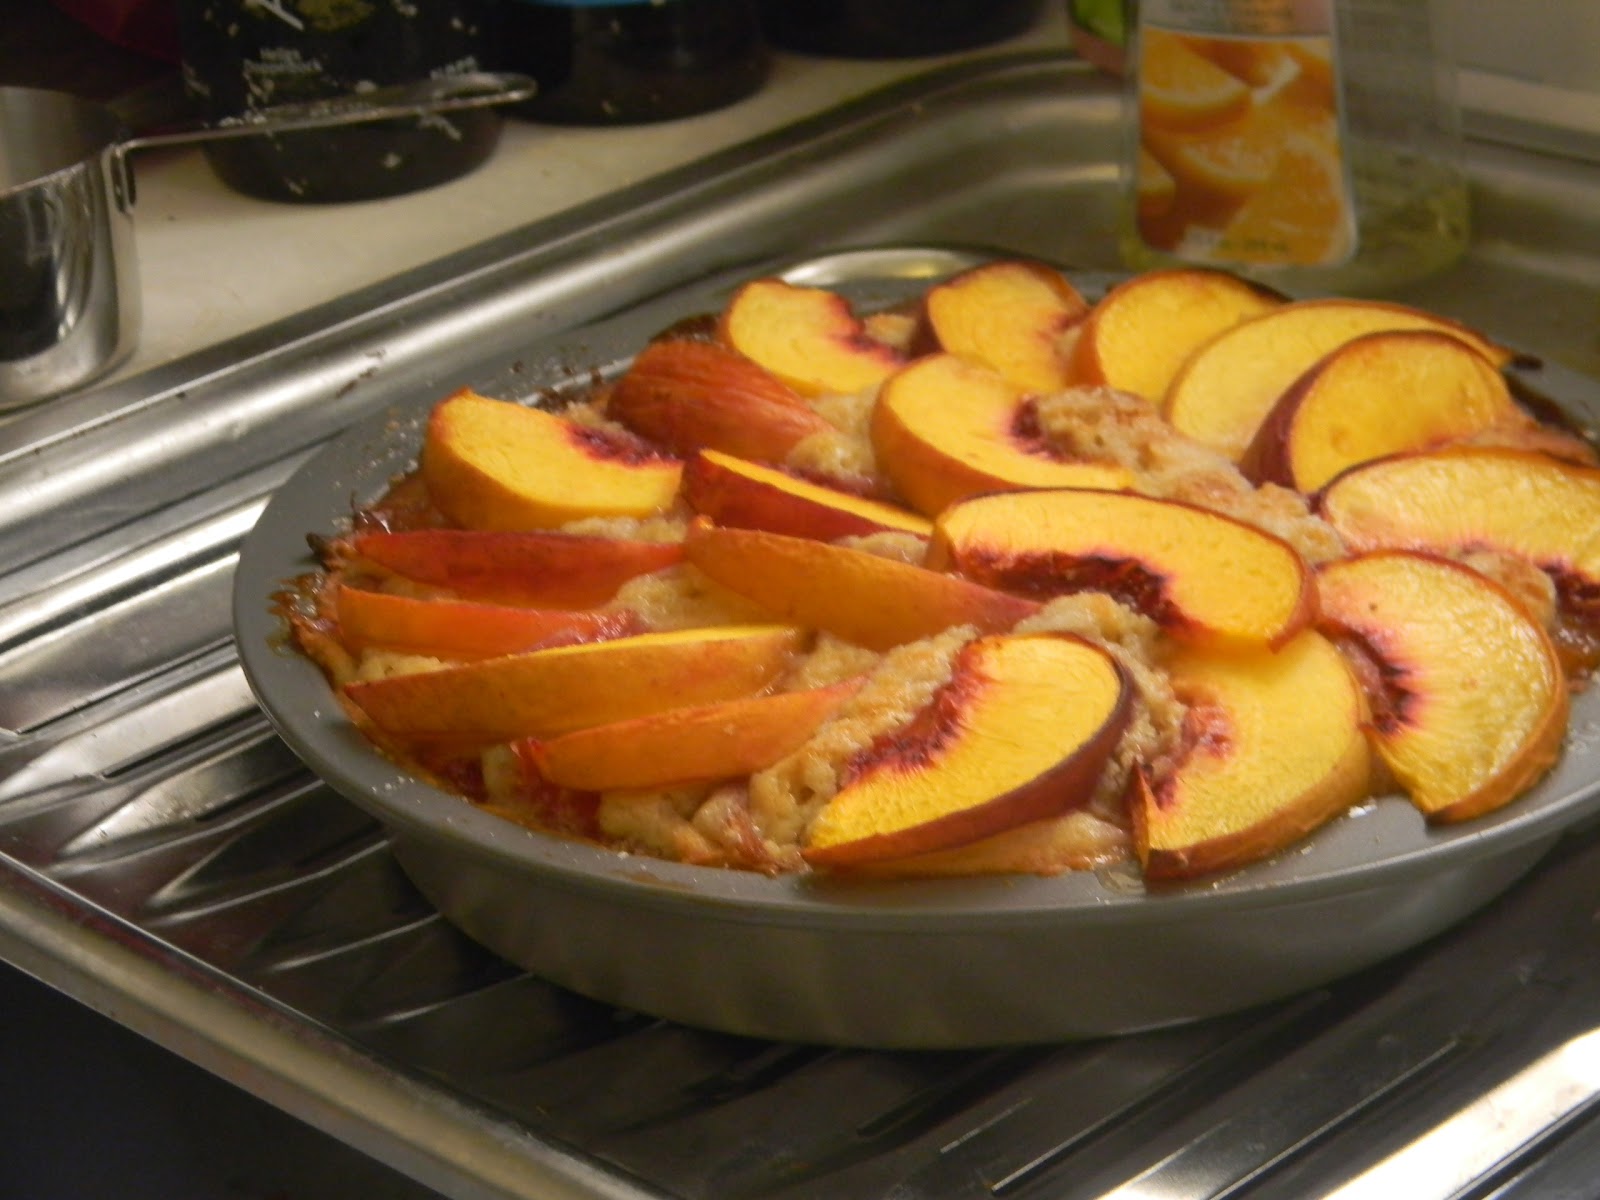
Peach time! First I crushed up some panko and tossed the peach chunks. Next I poured half the batter into my pan and smoothed it over with a spatula, then added the recently-cooled peach chunks, pressing them down into a single layer. Poured in the rest of the batter. Then I took the reserved wedges and placed them in a circle atop the batter. Then I realized I had them facing the wrong way, so I jumped in for a quick amendment before adding the rest of the sugar, moistened with 1/8 tsp of almond extract, to the top of the cake.

Then with my eyes large and proud with hunger, I put the cake in the oven for about an hour.


After retrieving the cake from the oven, I was forced to watch it cool for two to three hours (I compressed the wait with a little freezer time, so I could enjoy a slice before work.)

And voila! Summer peach cake and a dwindling of my baking fear.

Summer Peach Cake (via Cooks Illustrated)


  • 2 1/2pounds peaches , pitted and cut into 1/2 inch-thick wedges
  • 5tablespoons peach schnapps
  • 4teaspoons lemon juice
  • 6tablespoons plus 1/3 cup granulated sugar
  • 1cup (5 ounces) all-purpose flour
  • 1 1/4teaspoons baking powder
  • 3/4teaspoon salt
  • 1/2cup packed (3 1/2 ounces) light brown sugar
  • 2large eggs
  • 8tablespoons unsalted butter , melted and cooled
  • 1/4cup sour cream
  • 1 1/2teaspoons vanilla extract
  • 1/4teaspoon plus 1/8 teaspoon almond extract
  • 1/3cup panko bread crumbs , finely crushed